Setup of the plugin
1. Plugin installation
- Download the mame-qr-bill-woocommerce-[version].zip file from your mamedev.ch account.
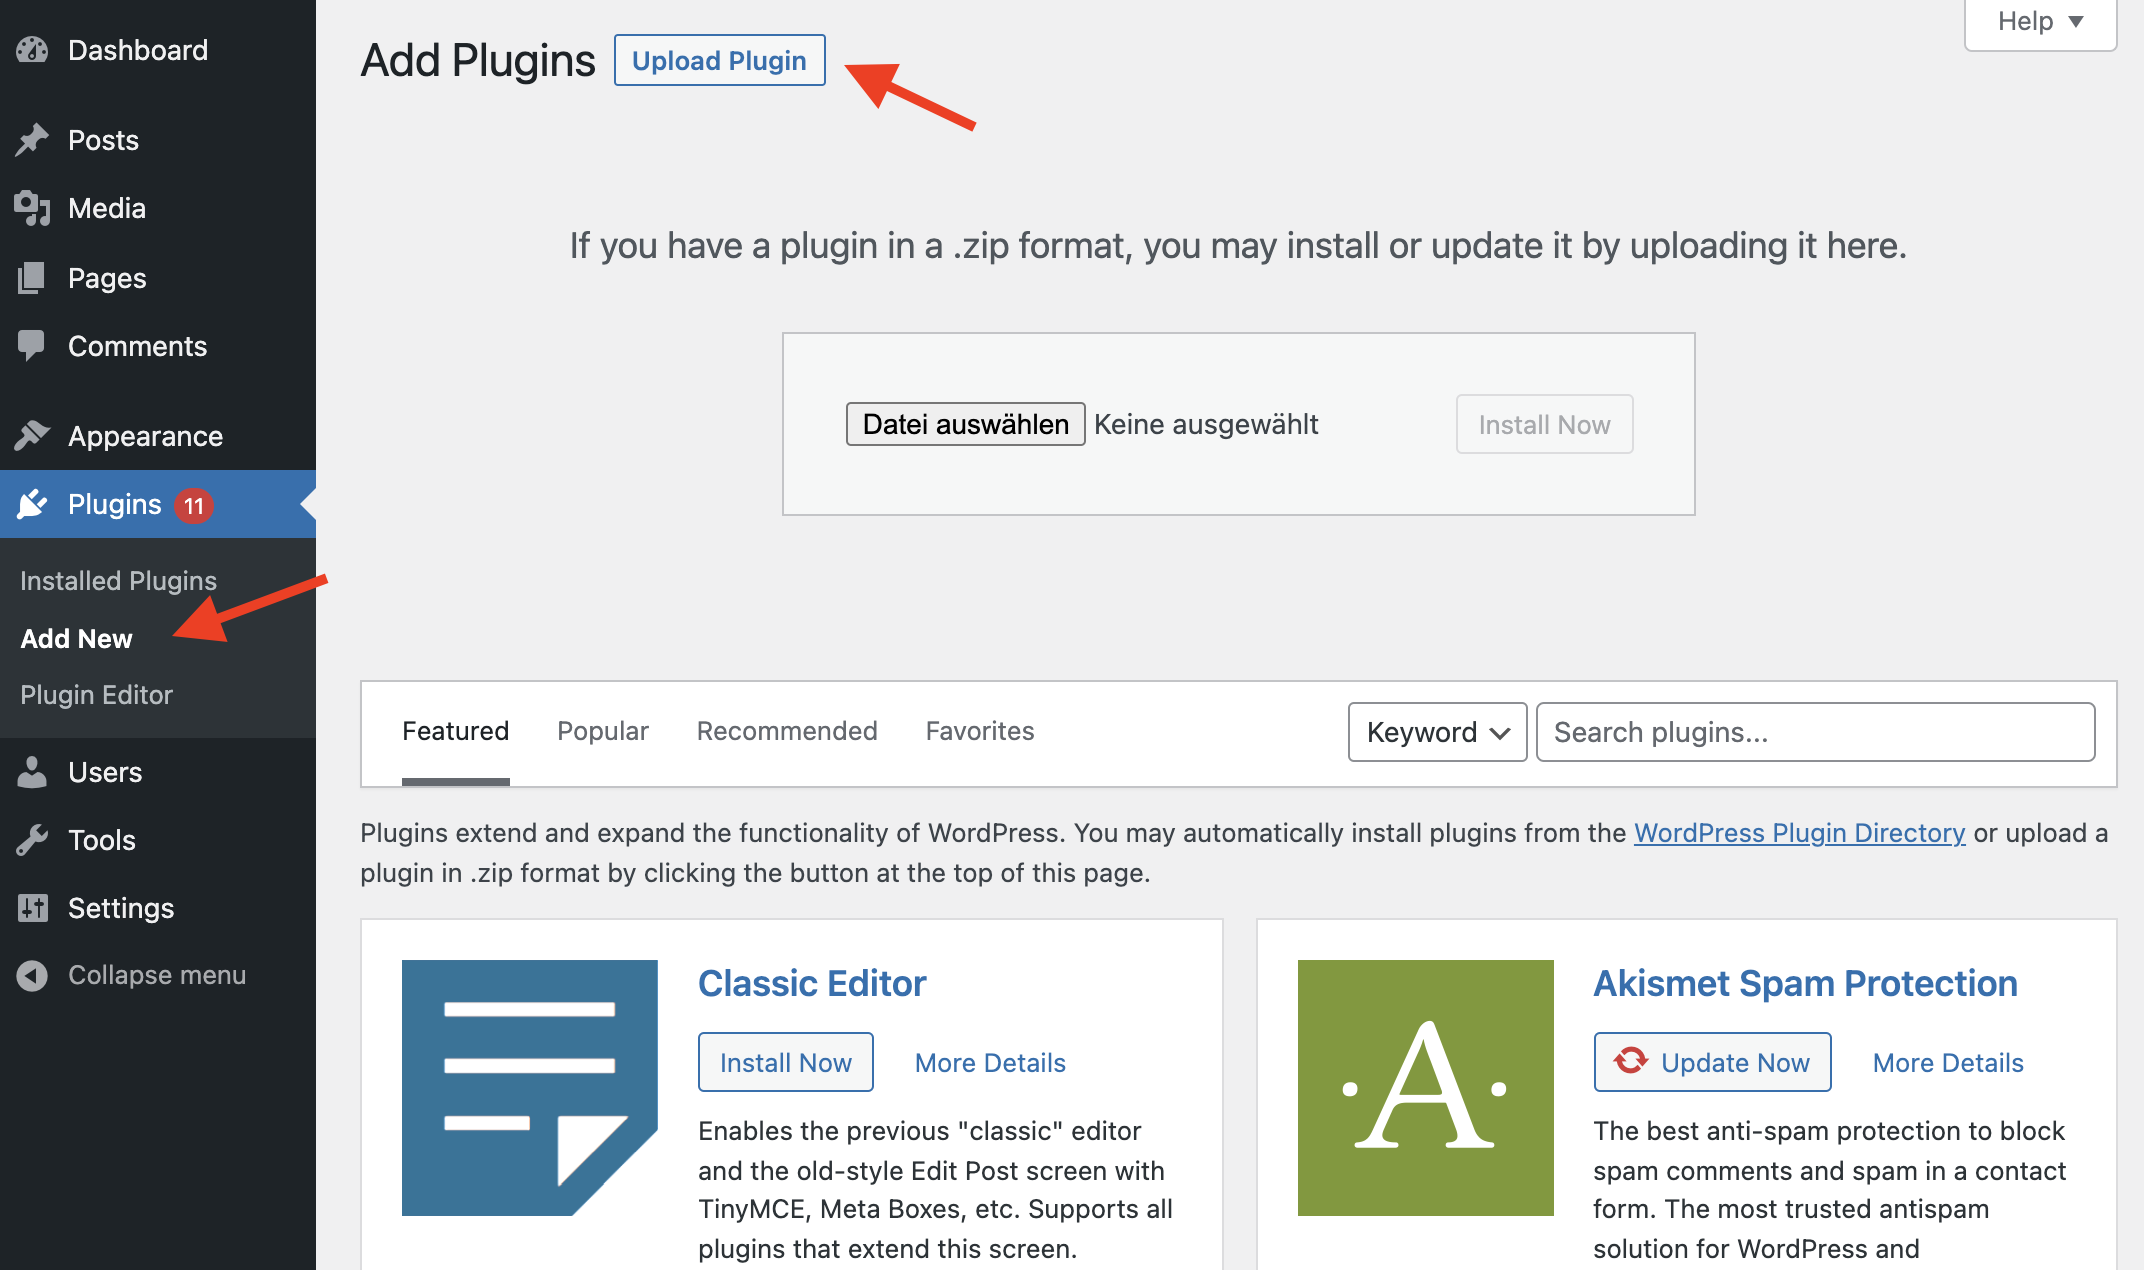
- In the WordPress backend on the “Plugins > Add New” page, click on the “Upload Plugin” button at the top and upload the ZIP file (not the unzipped folder).
- Activate the plugin under “Plugins > Installed Plugins”.
2. Activate license
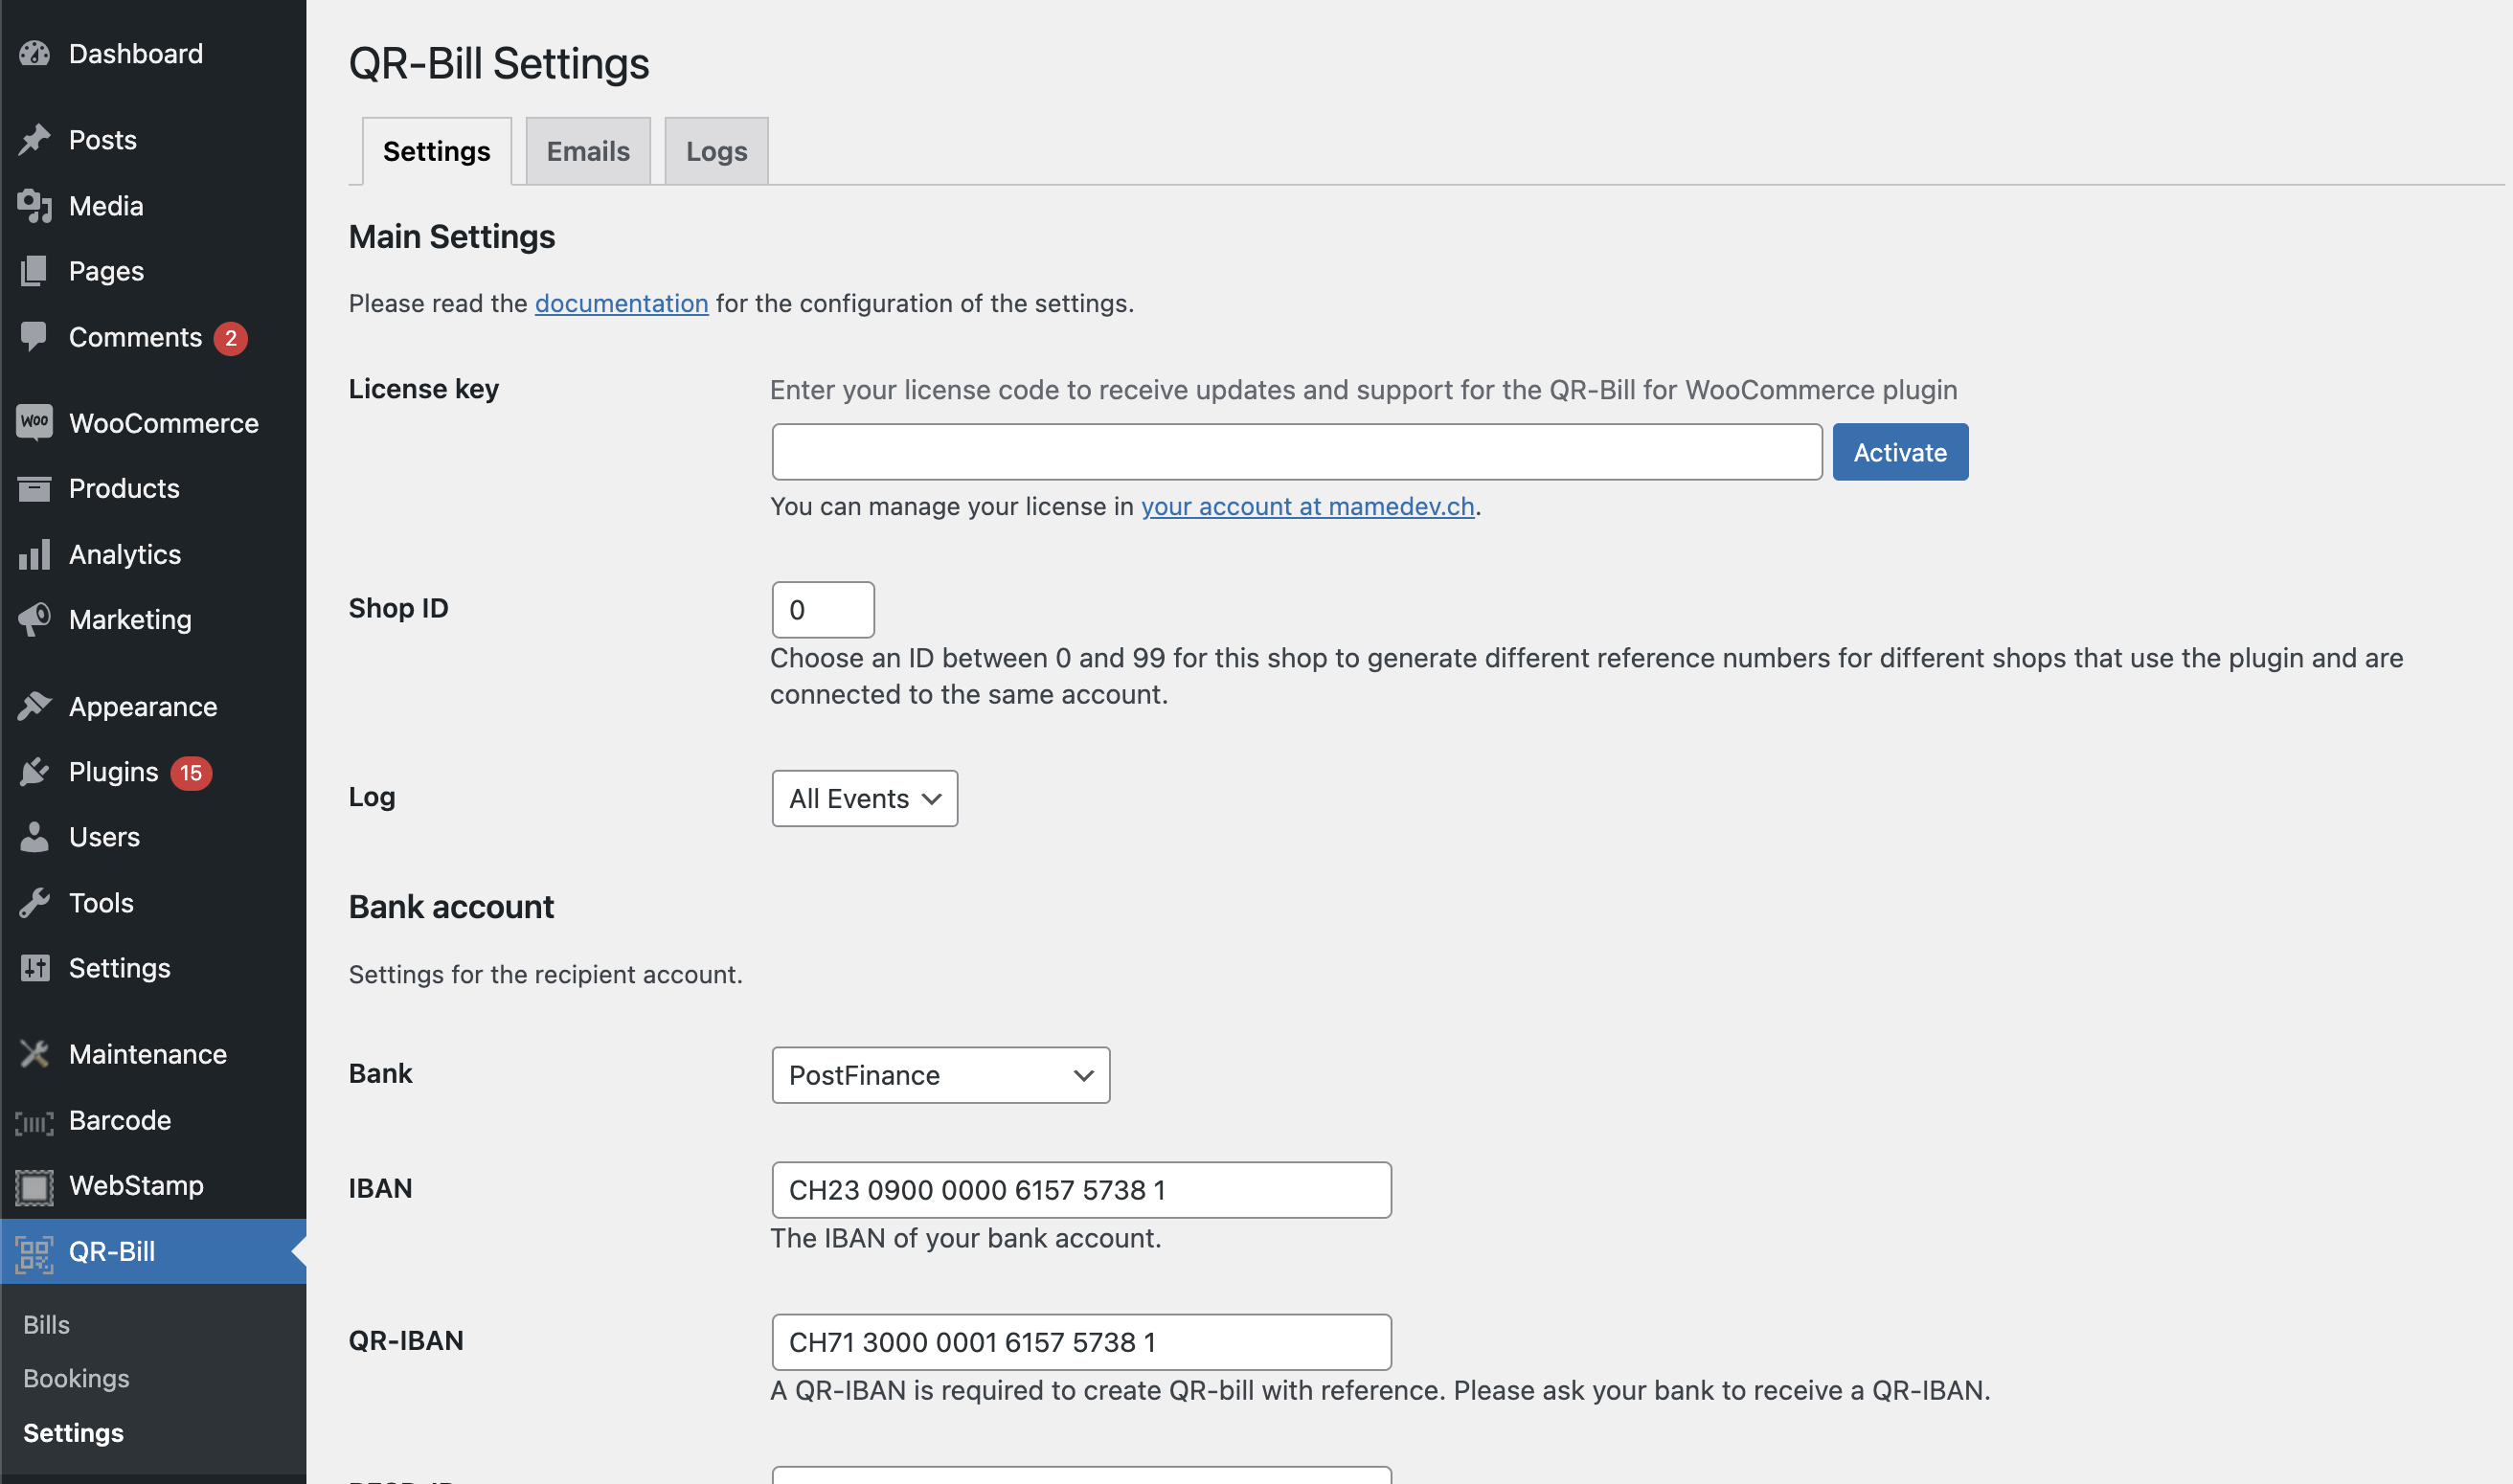
Go to “QR-Bill > Settings” and enter the license key that you received by email when you purchased the plugin. You can view the license at any time in your mamedev.ch account. Then click on the “Activate” button.
3. Enter bank account details
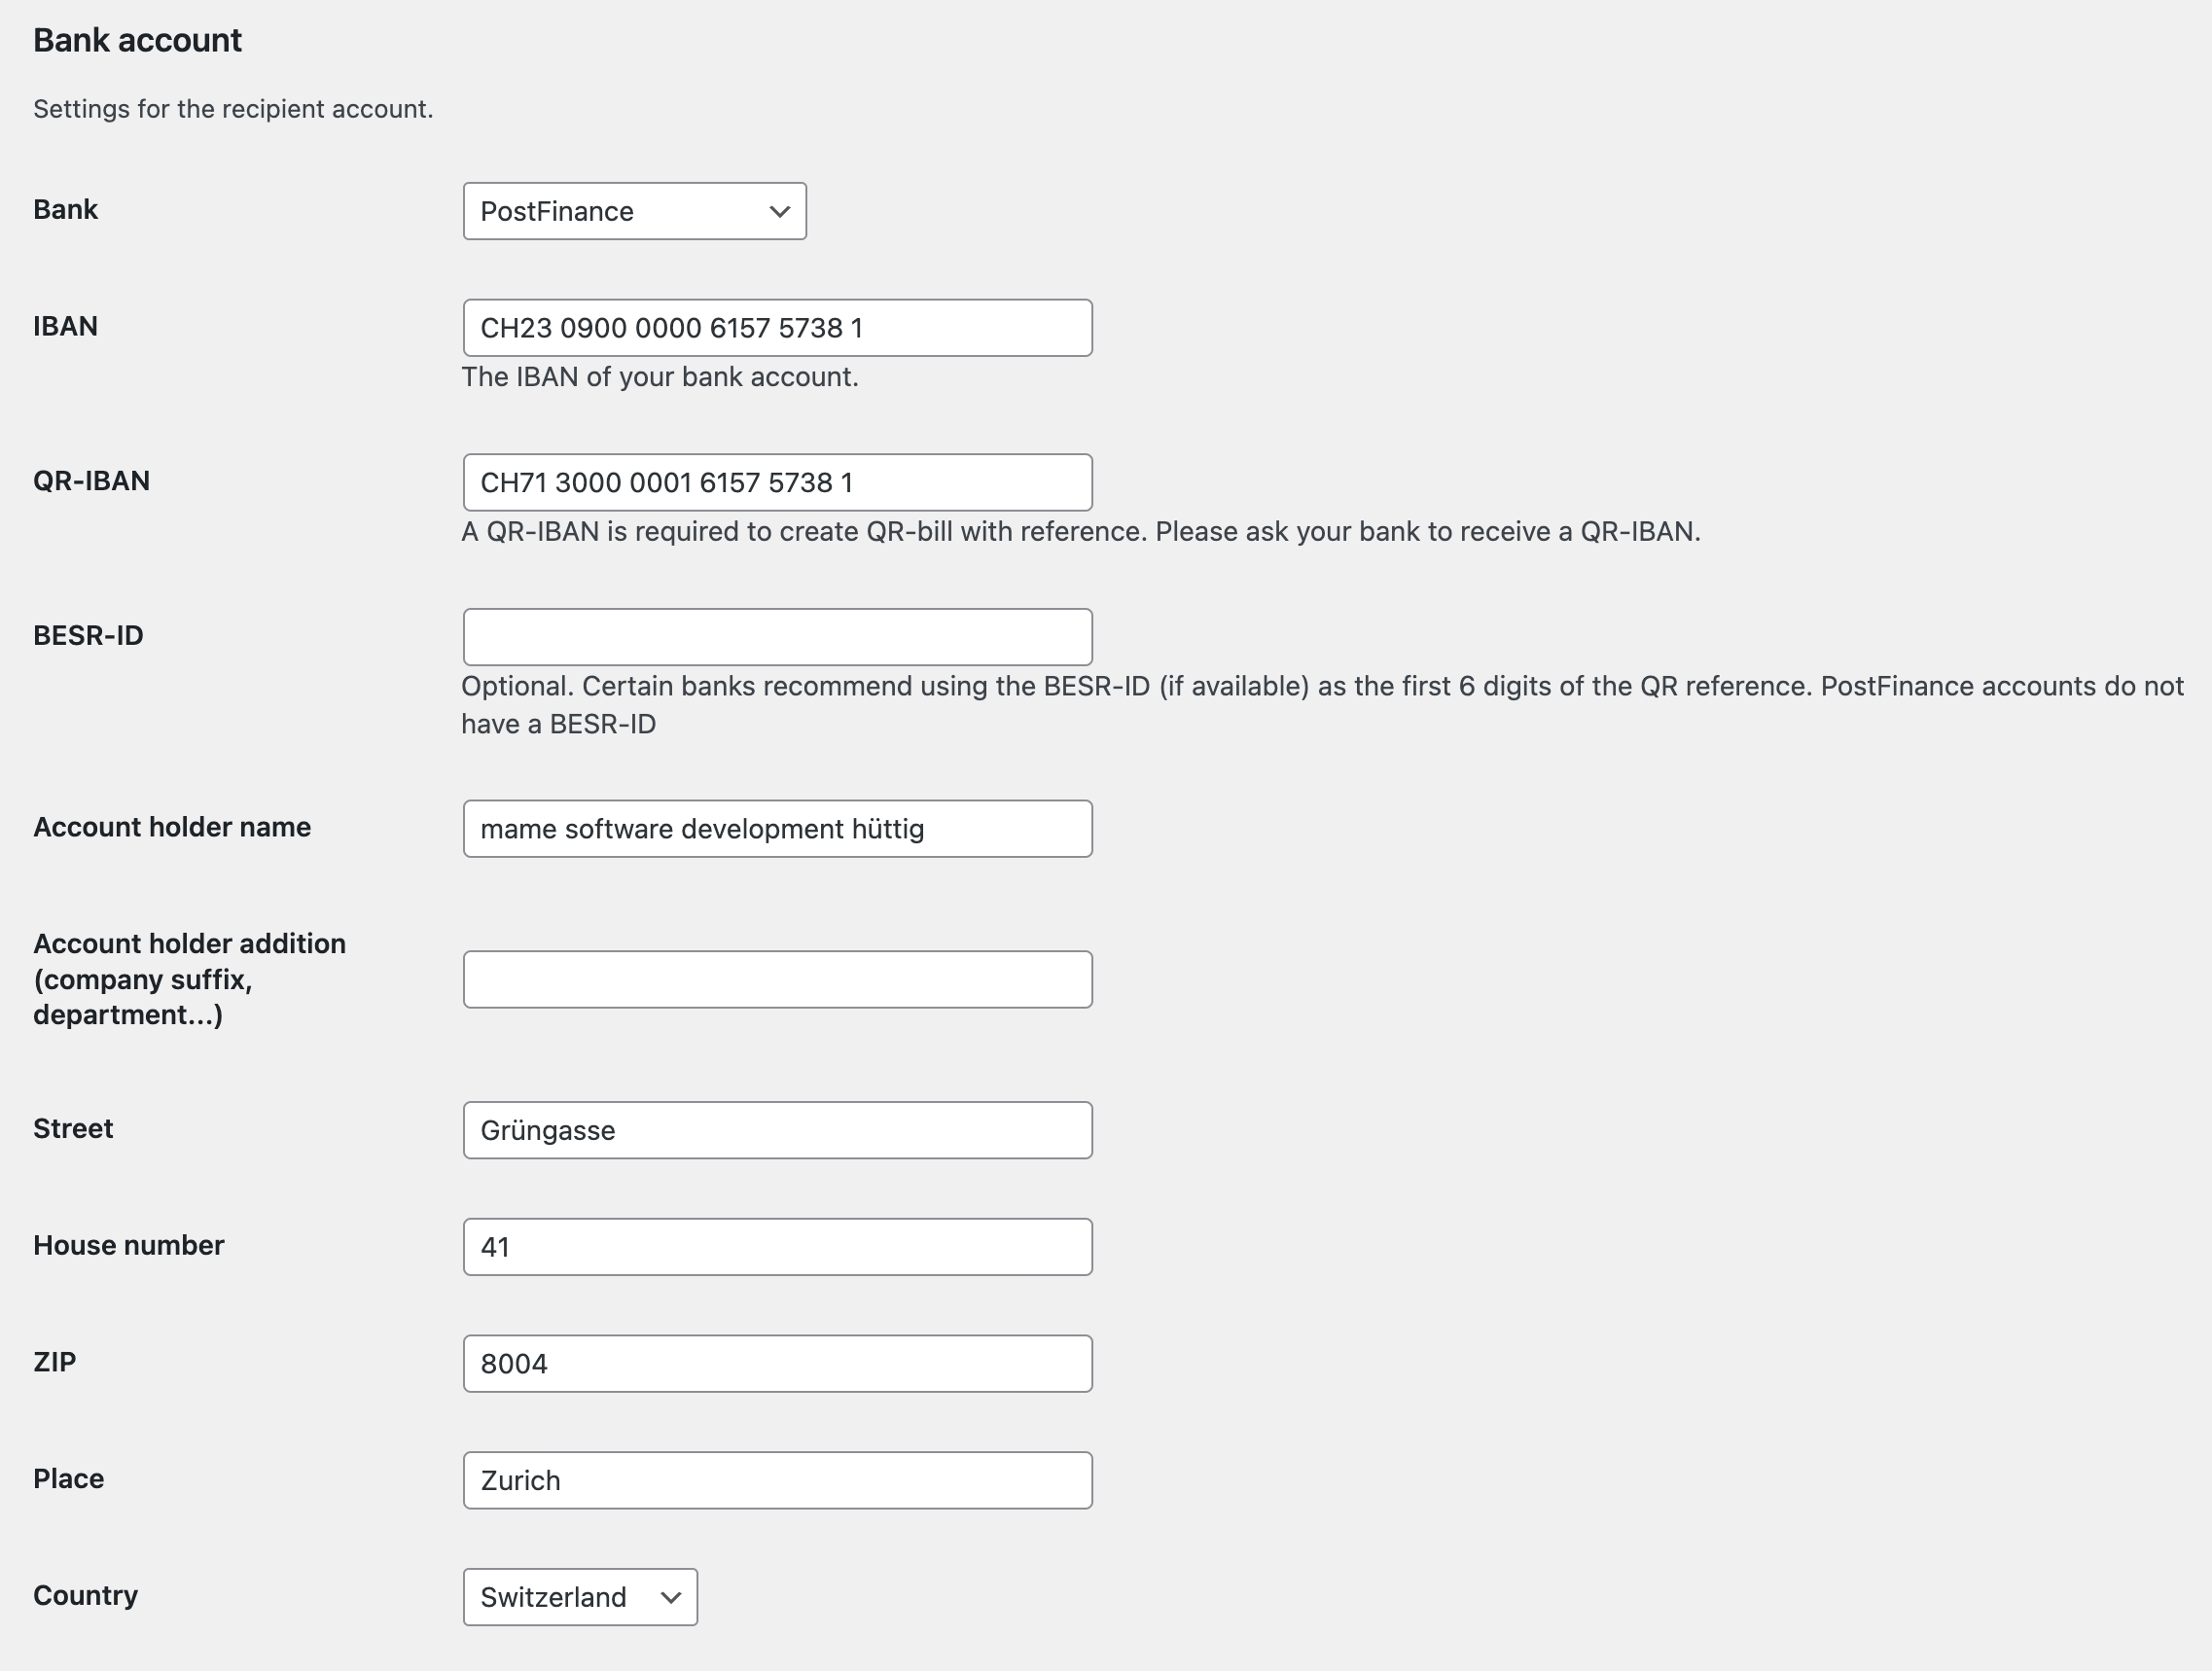
In the “Bank account” section on the “QR-Bill > Settings” page, at least the IBAN as well as the account holder and address must be entered so that QR-Bills can be created.
If QR-bills are to be created with a reference number, the QR-IBAN must also be entered. If you don’t have a QR-IBAN for your account yet, you can contact the bank to get a QR-IBAN.
The BESR ID field is optional. Certain banks recommend using the previous BESR-ID from ISR payment slips (if available) for the first 6 digits of the QR reference.
4. Activate payment method
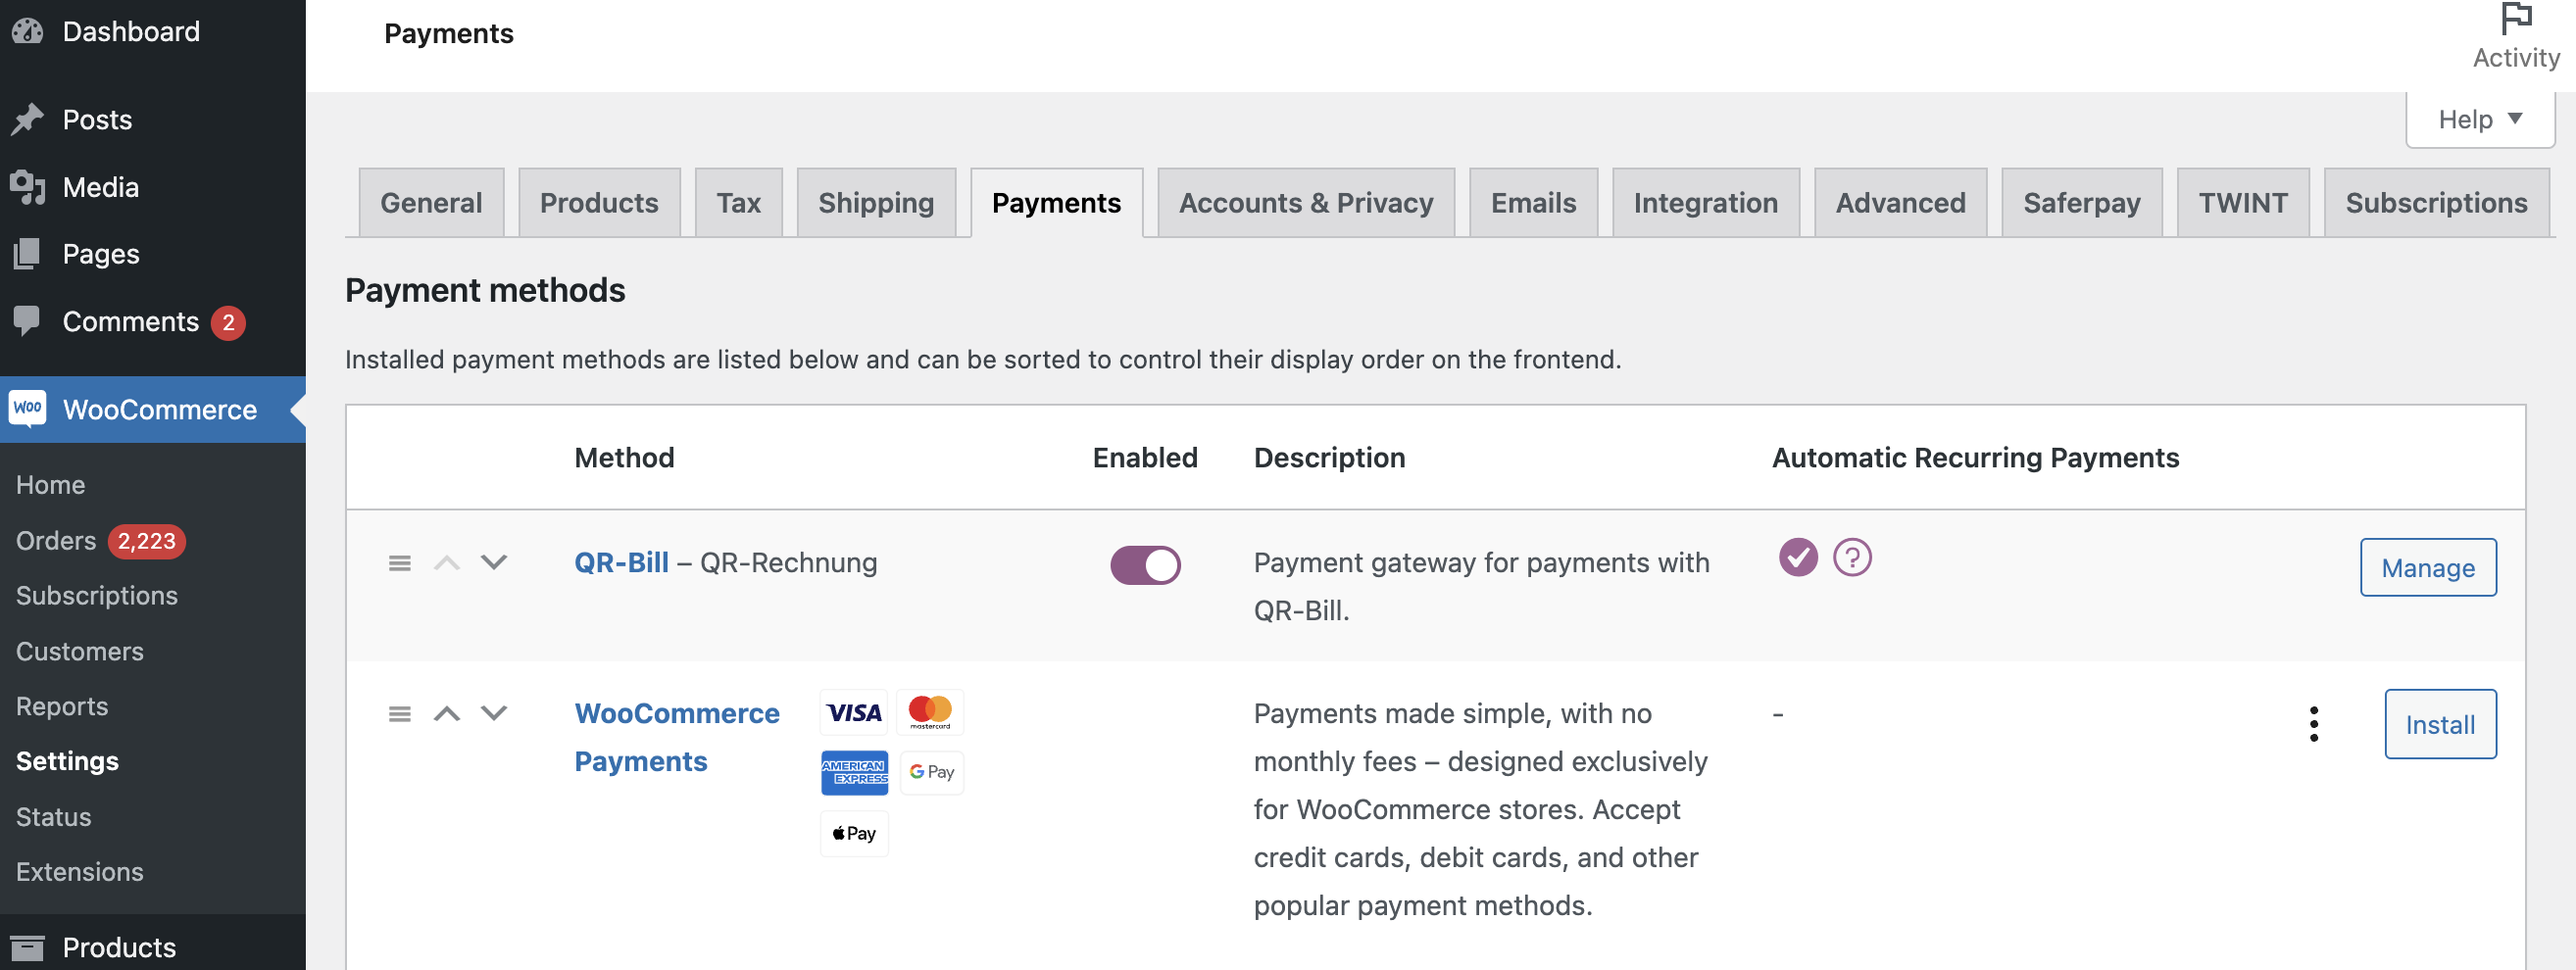
Activate the payment method “QR Bill” under “WooCommerce > Settings > Payments” so that the payment method is displayed at the checkout.
5. Configure API connection
The API connection is used to use functions such as updating the status of QR-bills based on credits to your own bank account or for QR-bill payments via TWINT.
To create the API token and the webhook key, you can log in to your mamedev.app account.

If you don’t have an account yet, you can create a new account at mamedev.app/register. To do this you need the license key (see step 1). Alternatively, you can create a user for mamedev.app in your mamedev.ch account.
After logging in, go to the page “Settings > API Settings”. On this page you can generate a new webhook key by clicking on the “Generate new key” button.

On the same page under “Api Tokens > Add Api Token” you can generate a new token. Enter any name (e.g. the name of your shop) and select “QR-Bill” in the selection field.
Now enter the webhook key and API token in the corresponding fields in the setup assistant.
You can find the setup for the available services on the following pages: