Setting up the plugin
Please log in to the following accounts to set up the plugin:
- Your account at mamedev.ch
- The WordPress backend of your website

Start the Setup Wizard
Log in to your account at mamedev.ch and go to “Applications > Saferpay”.
On this page, click “WooCommerce Setup” to start the setup wizard.
Contracts with Worldline/Saferpay
If you do not yet have any acquiring agreements with Worldline for Saferpay, you can download the required contract documents from “Billing Conditions” on this page. Please complete and sign the documents and send them to us via the support form, so that we can set up a new terminal together with Worldline.
Once the Saferpay terminal has been set up, we will contact you so you can continue with the setup.
1. Create a Payment Configuration
In the first step of the setup wizard, you can create a new payment configuration or select an existing one. Payment configurations are required for billing the transaction fees charged by mame. Worldline acquiring fees are billed separately by Worldline (see above).
A payment configuration can be used for multiple shops/integrations if they should all be billed via a monthly invoice using the same billing address and payment method.

2. Create a Store
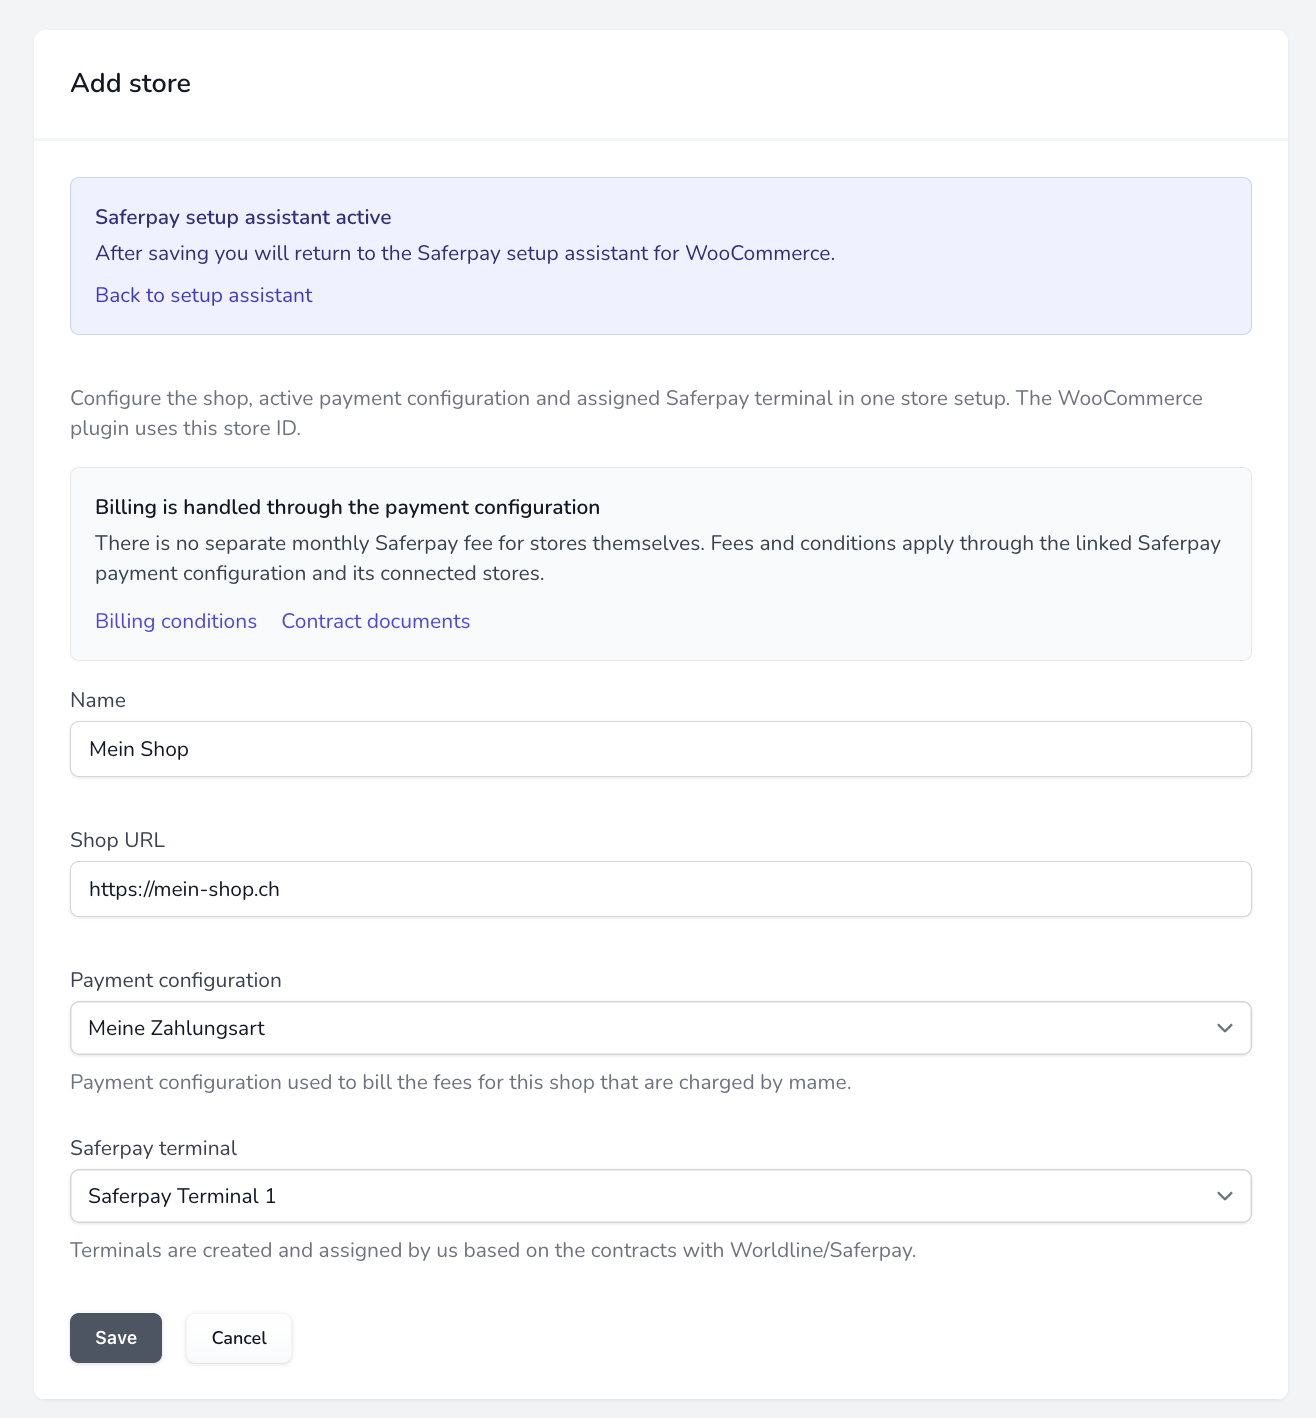
Add your shop or select an existing shop to configure it.
Under “Payment Configuration”, select the payment configuration you created in step 1.
Under “Saferpay Terminal”, all available Saferpay terminals are displayed. These terminals are set up by us together with Worldline. An acquiring agreement with Worldline/Saferpay is required for this (see above).
3. Install the Plugin and Activate the License
First, install the Saferpay for WooCommerce plugin. Download the latest version from your account at mamedev.ch under “Downloads”, then upload it under “Plugins” in your website’s WordPress backend.
In your WordPress backend: Go to “WooCommerce > Settings > Saferpay”, enter your plugin license in the corresponding field, and click “Activate”.
Then return to the setup wizard at mamedev.ch and click “Refresh Licenses” in step 3. The corresponding license should now appear as activated for the URL.

4. Create an API Client and Webhook Key
In step 4, create a new API client. Copy the Client ID and Client Secret into the corresponding fields in the plugin settings in your WordPress backend and click “Save”. If a green confirmation message appears, your shop is successfully connected to the API.
Note: The Client Secret is displayed only once after it is generated. Make sure to copy it immediately and save it in the plugin settings in your WordPress backend.
Next, copy the Webhook Key from the setup wizard, or generate a new one. Enter it in the corresponding field in the plugin settings in your WordPress backend and save the settings.
Note: If you generate a new Webhook Key, it must also be updated in all previously connected plugins/integrations.

5. Load and Connect the Store
In your WordPress backend, under “WooCommerce > Settings > Saferpay”:
Under “Store”, click “Load Stores” and select the store you created in step 2. Then save the settings.
Setup Complete
All that remains is to enable the desired Saferpay payment methods under “WooCommerce > Settings > Payments”.
We recommend making a test payment right away. You can refund the test payment directly from the order management screen in your WordPress backend.