Setting up the plugin
For setting up the plugin you need a free TWINT portal account:
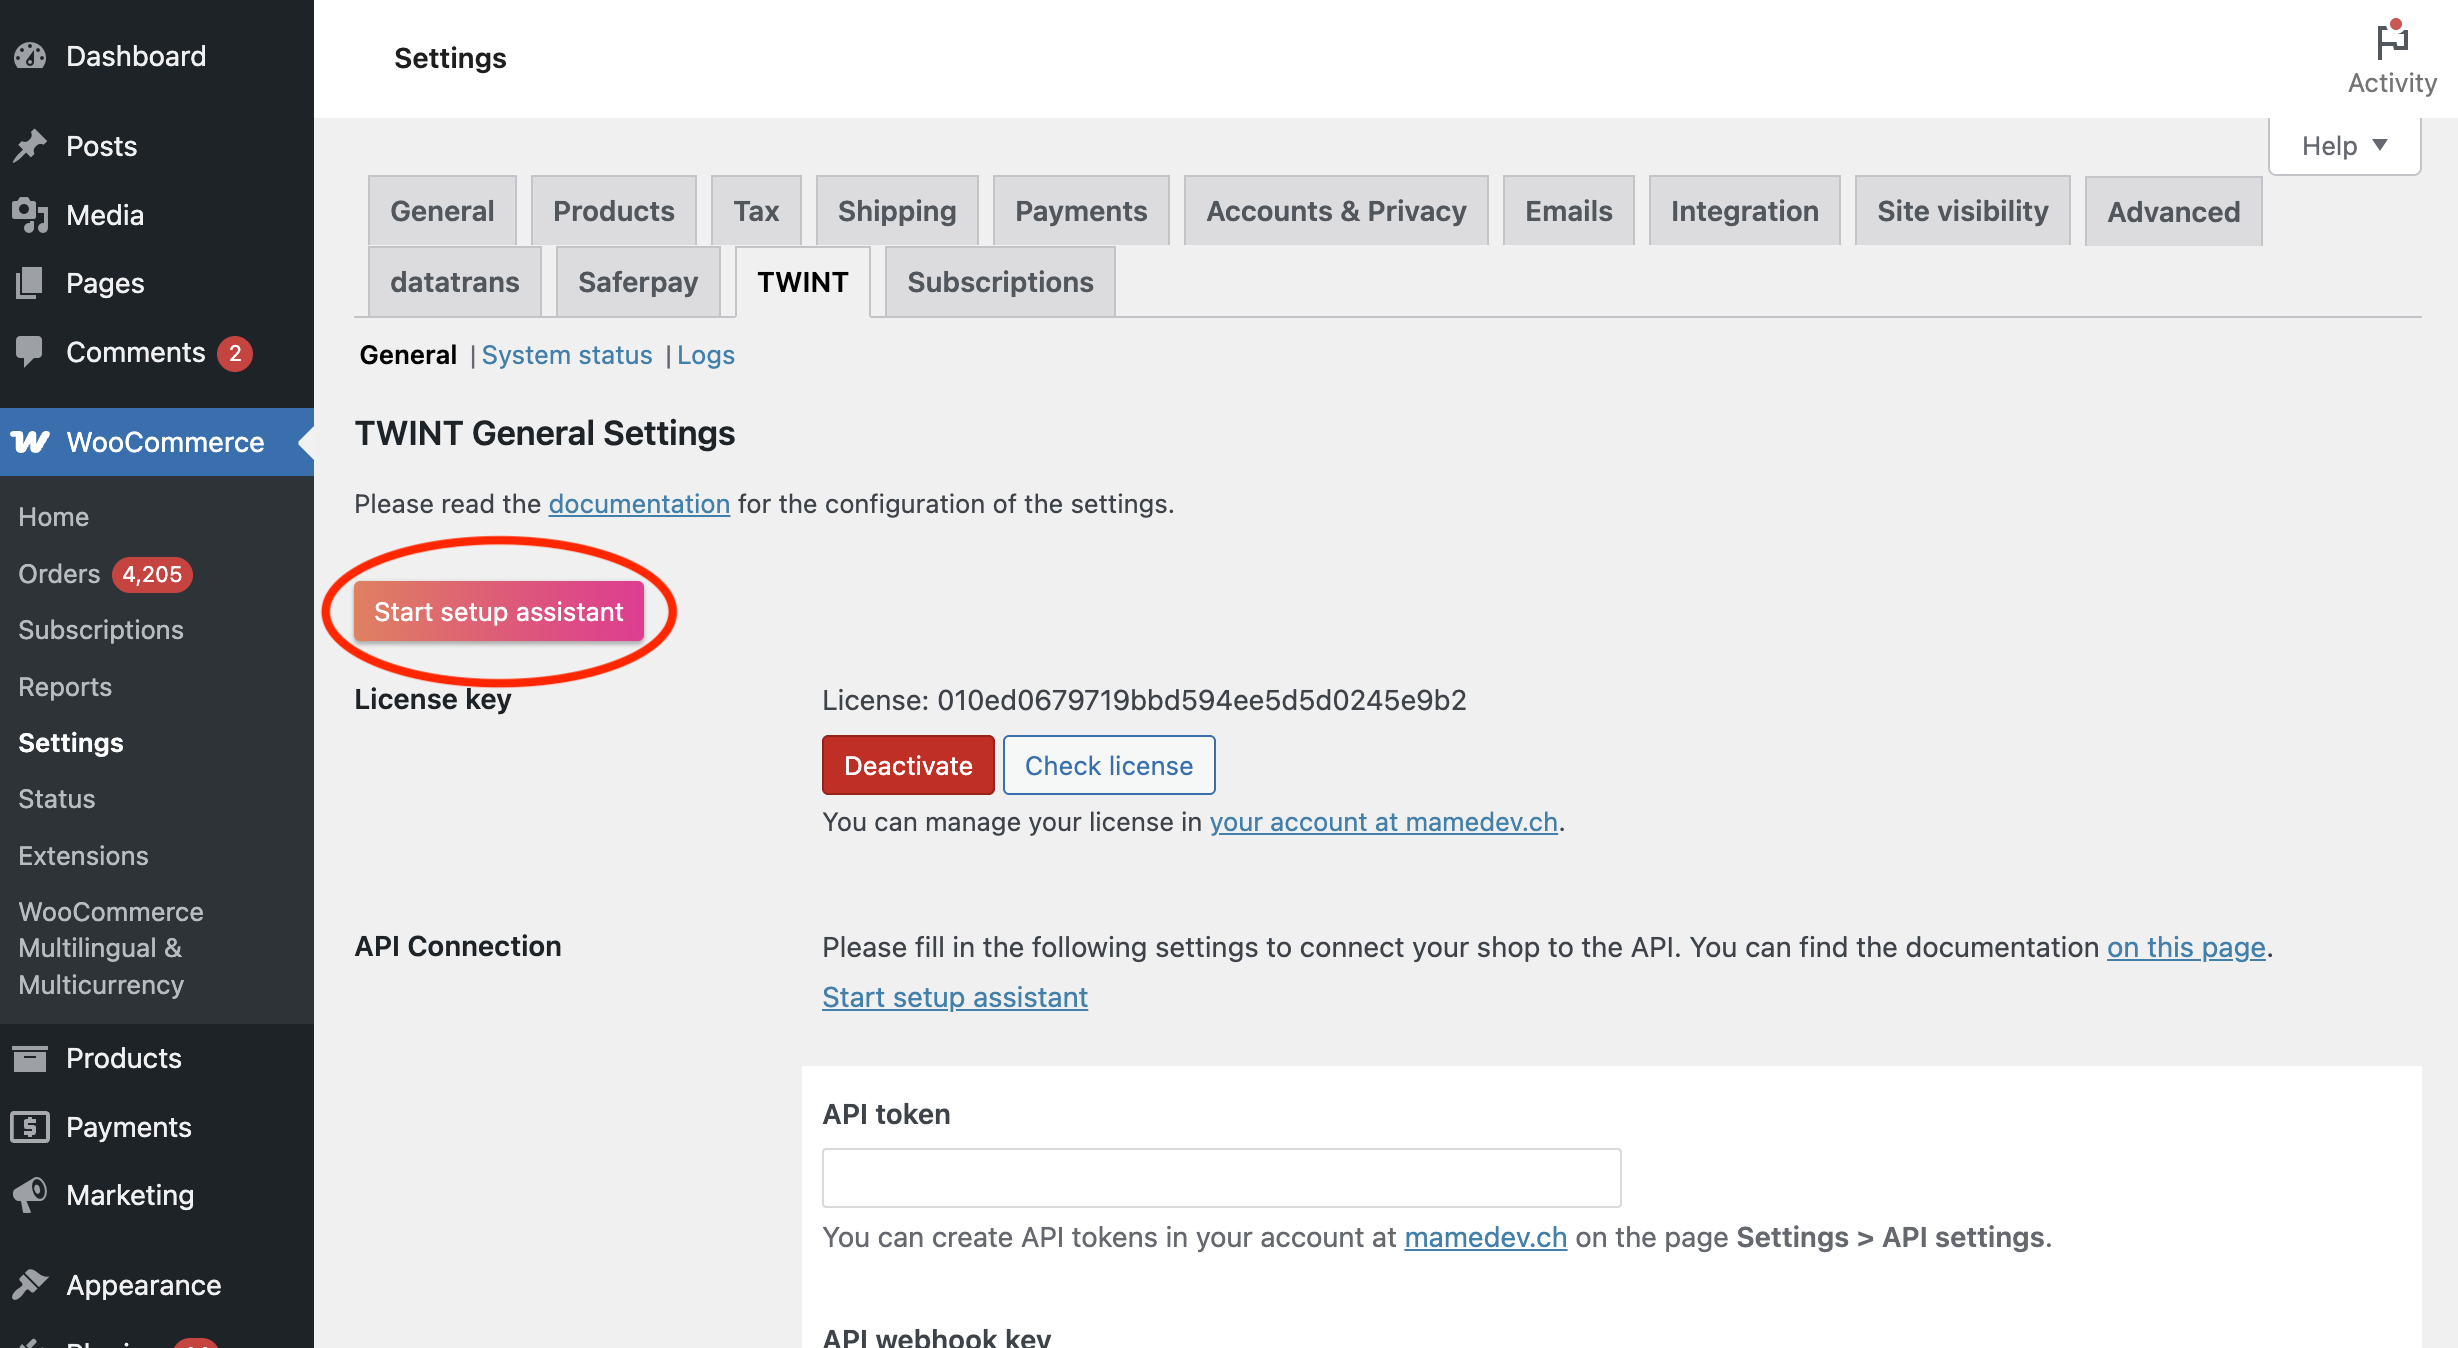
Start setup assistant
Log in to the WordPress backend of your website and start the setup assistant on the page “WooCommerce > Settings > TWINT” by clicking on the corresponding button.
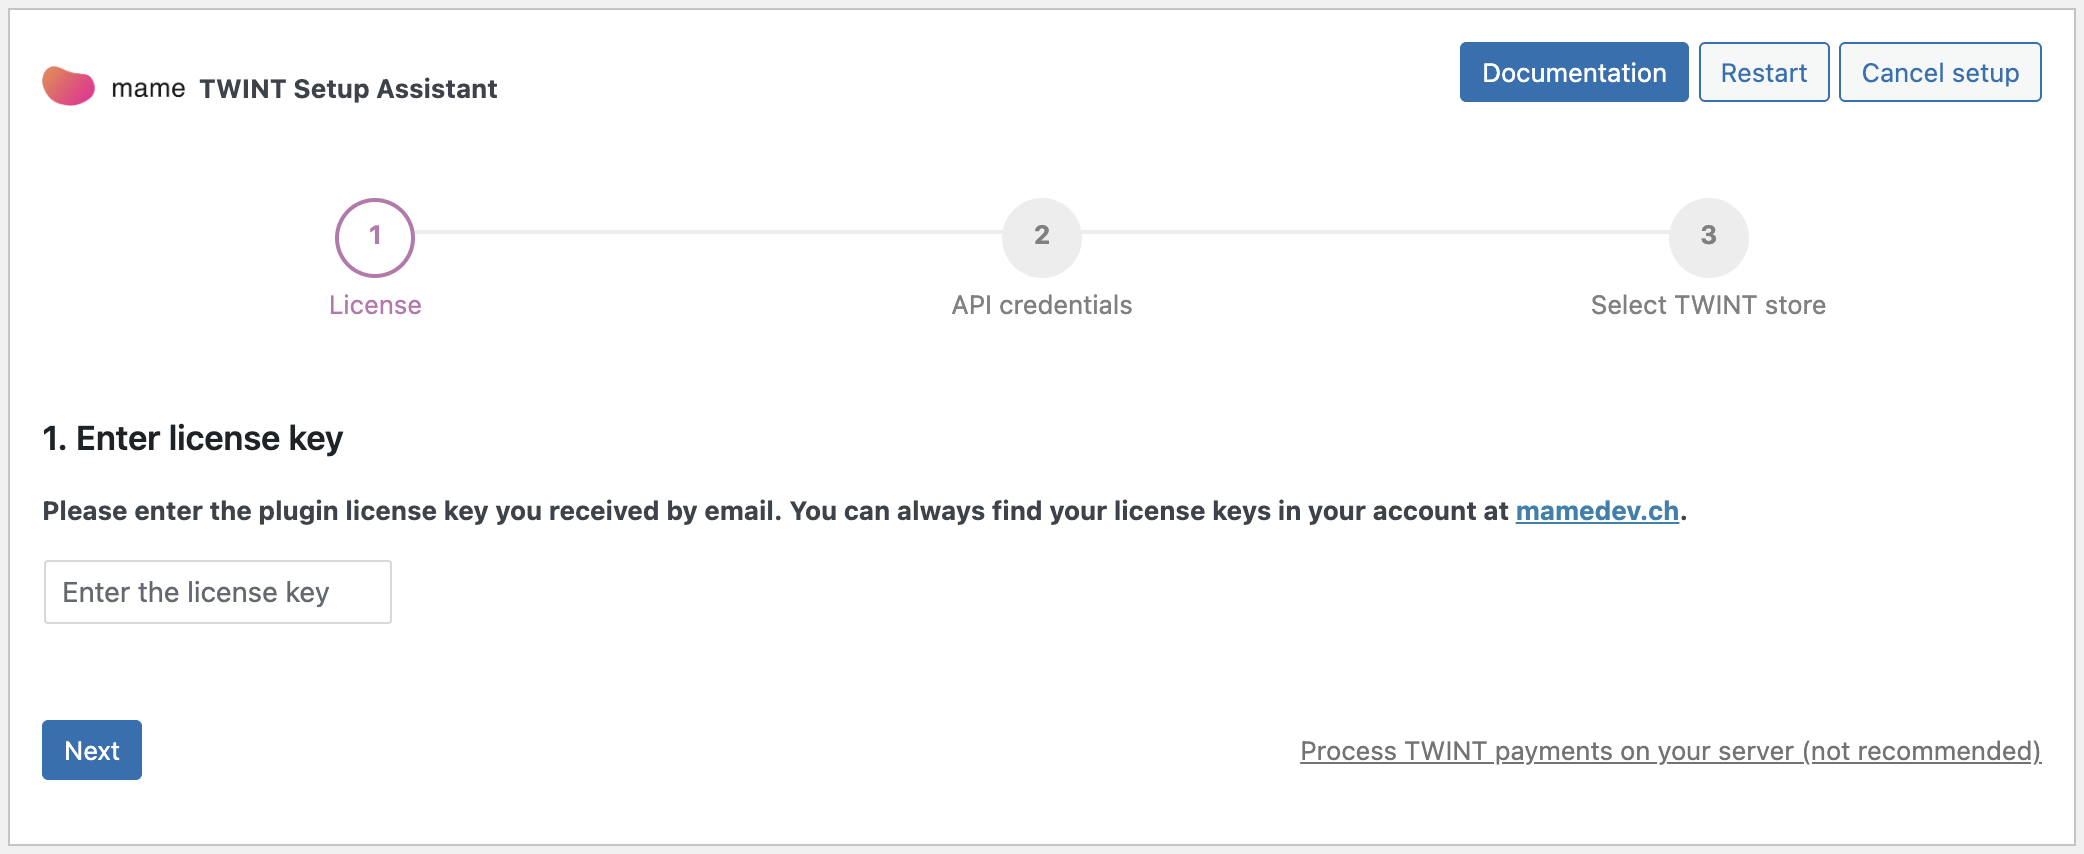
Step 1: Enter license key
In the first step, enter the license key that you received via email when you purchased the plugin. You can also find the license in your account at mamedev.ch.
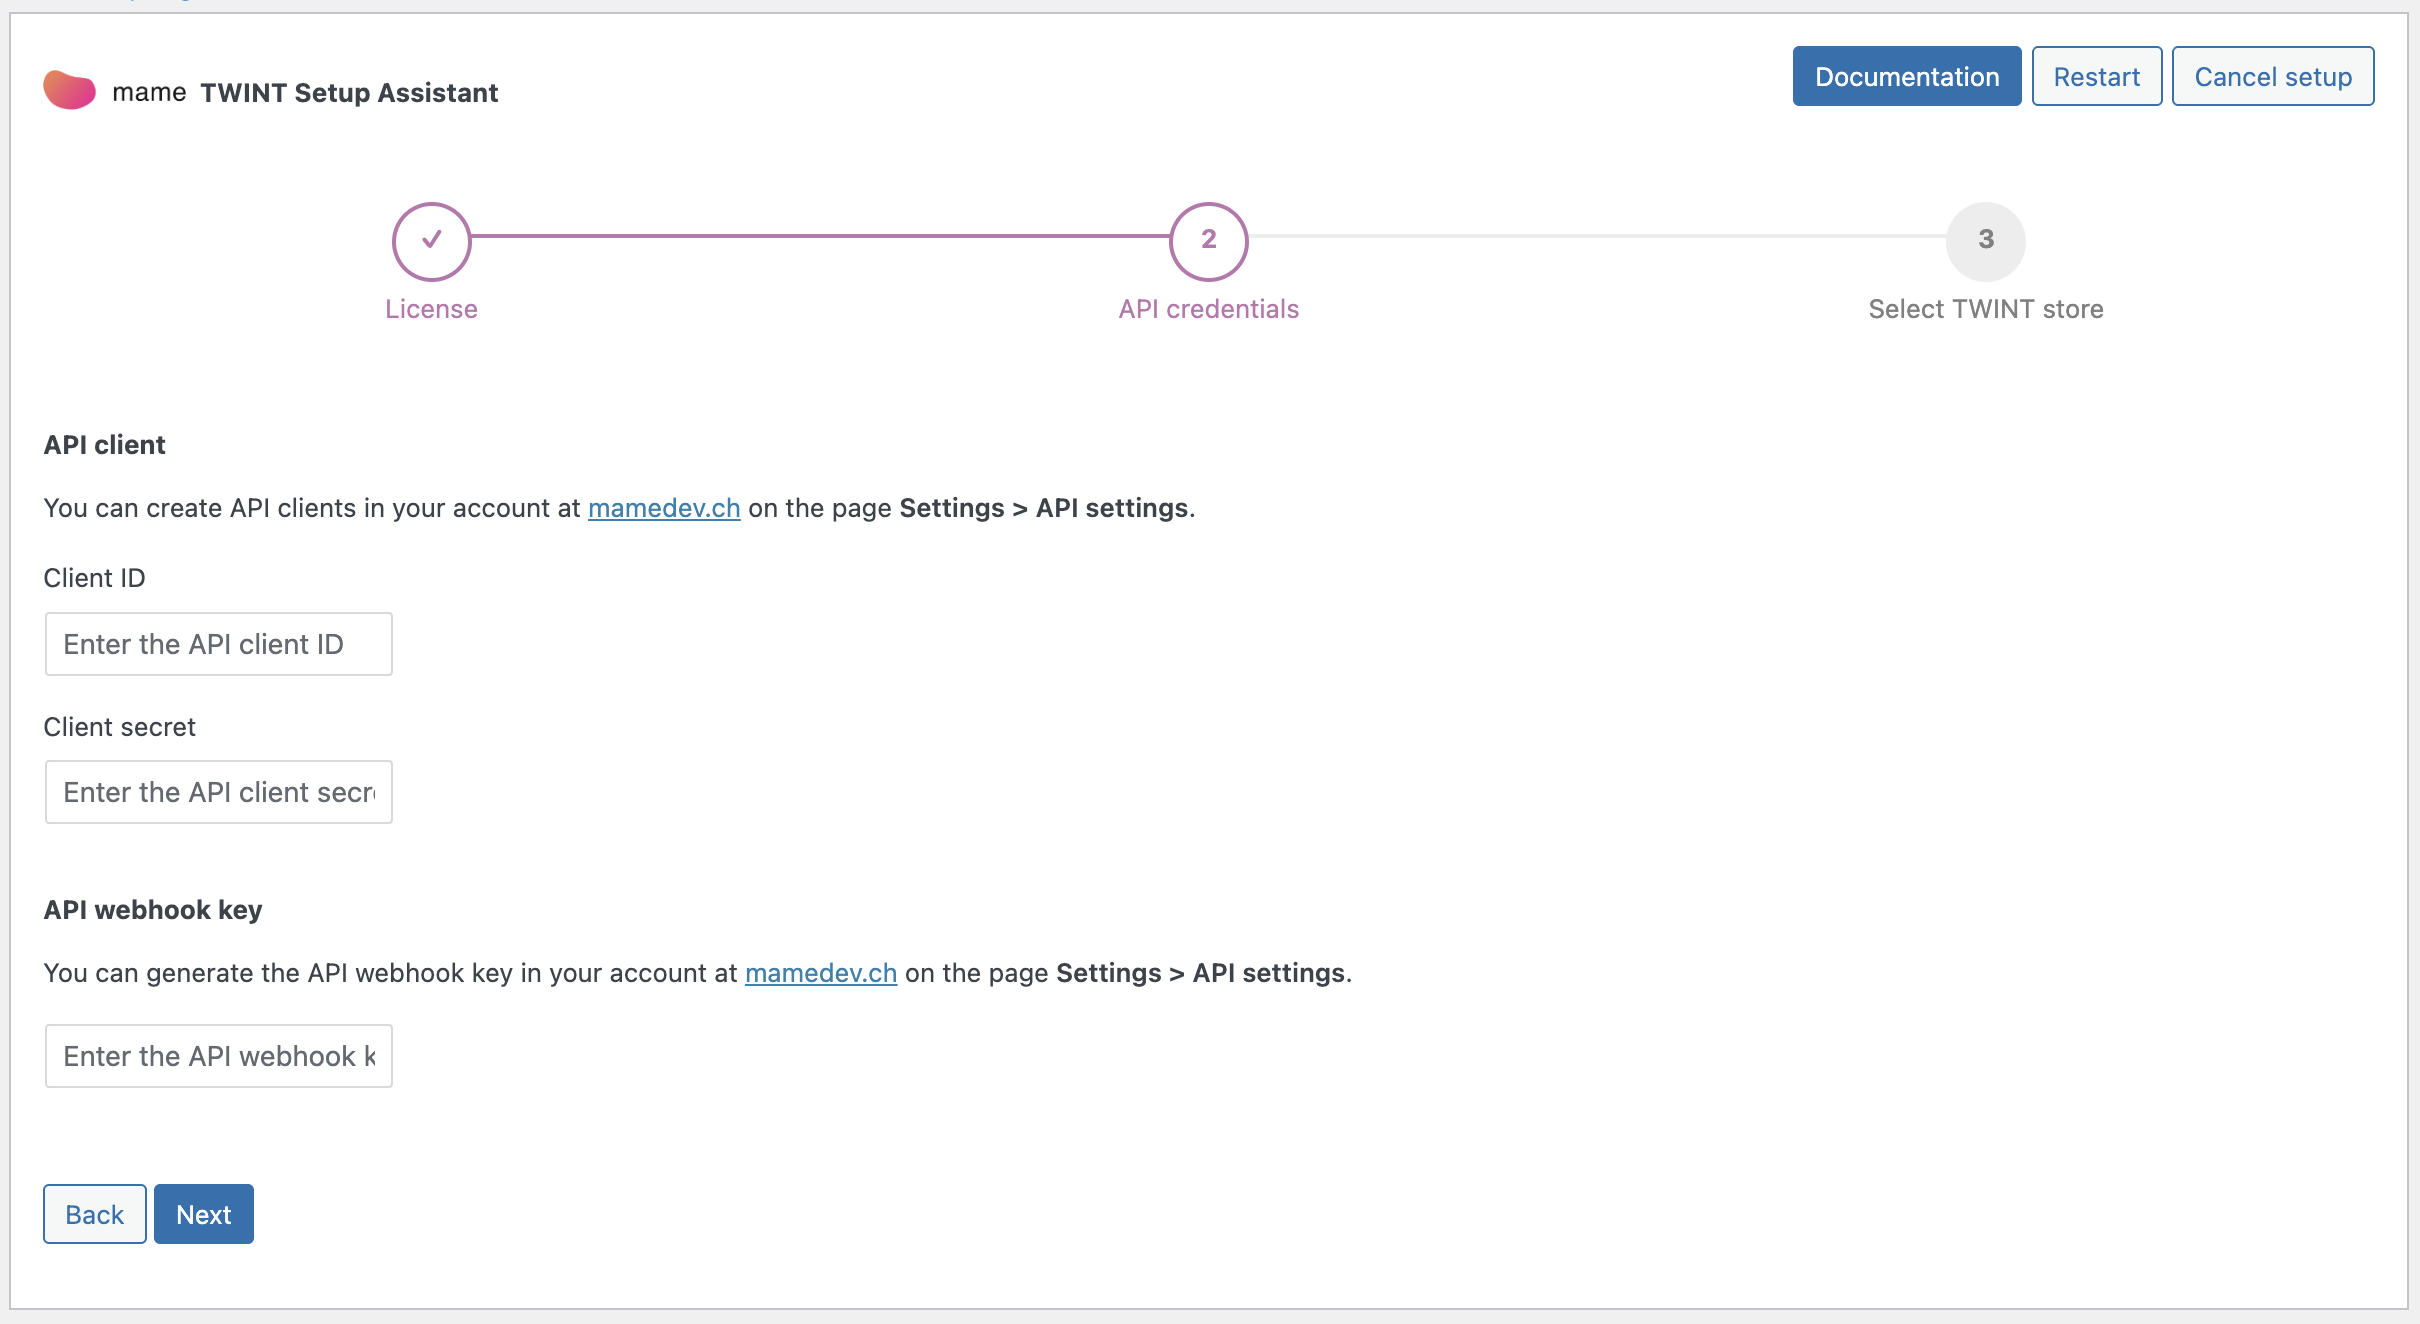
Step 2: Enter API credentials
To receive the API client ID, client secret and the webhook key, you can log in to your mamedev.ch account.
After logging in, go to the page “Dashboard > Settings > API Settings”. On this page you can generate a new webhook key by clicking on the “Generate new key” button.
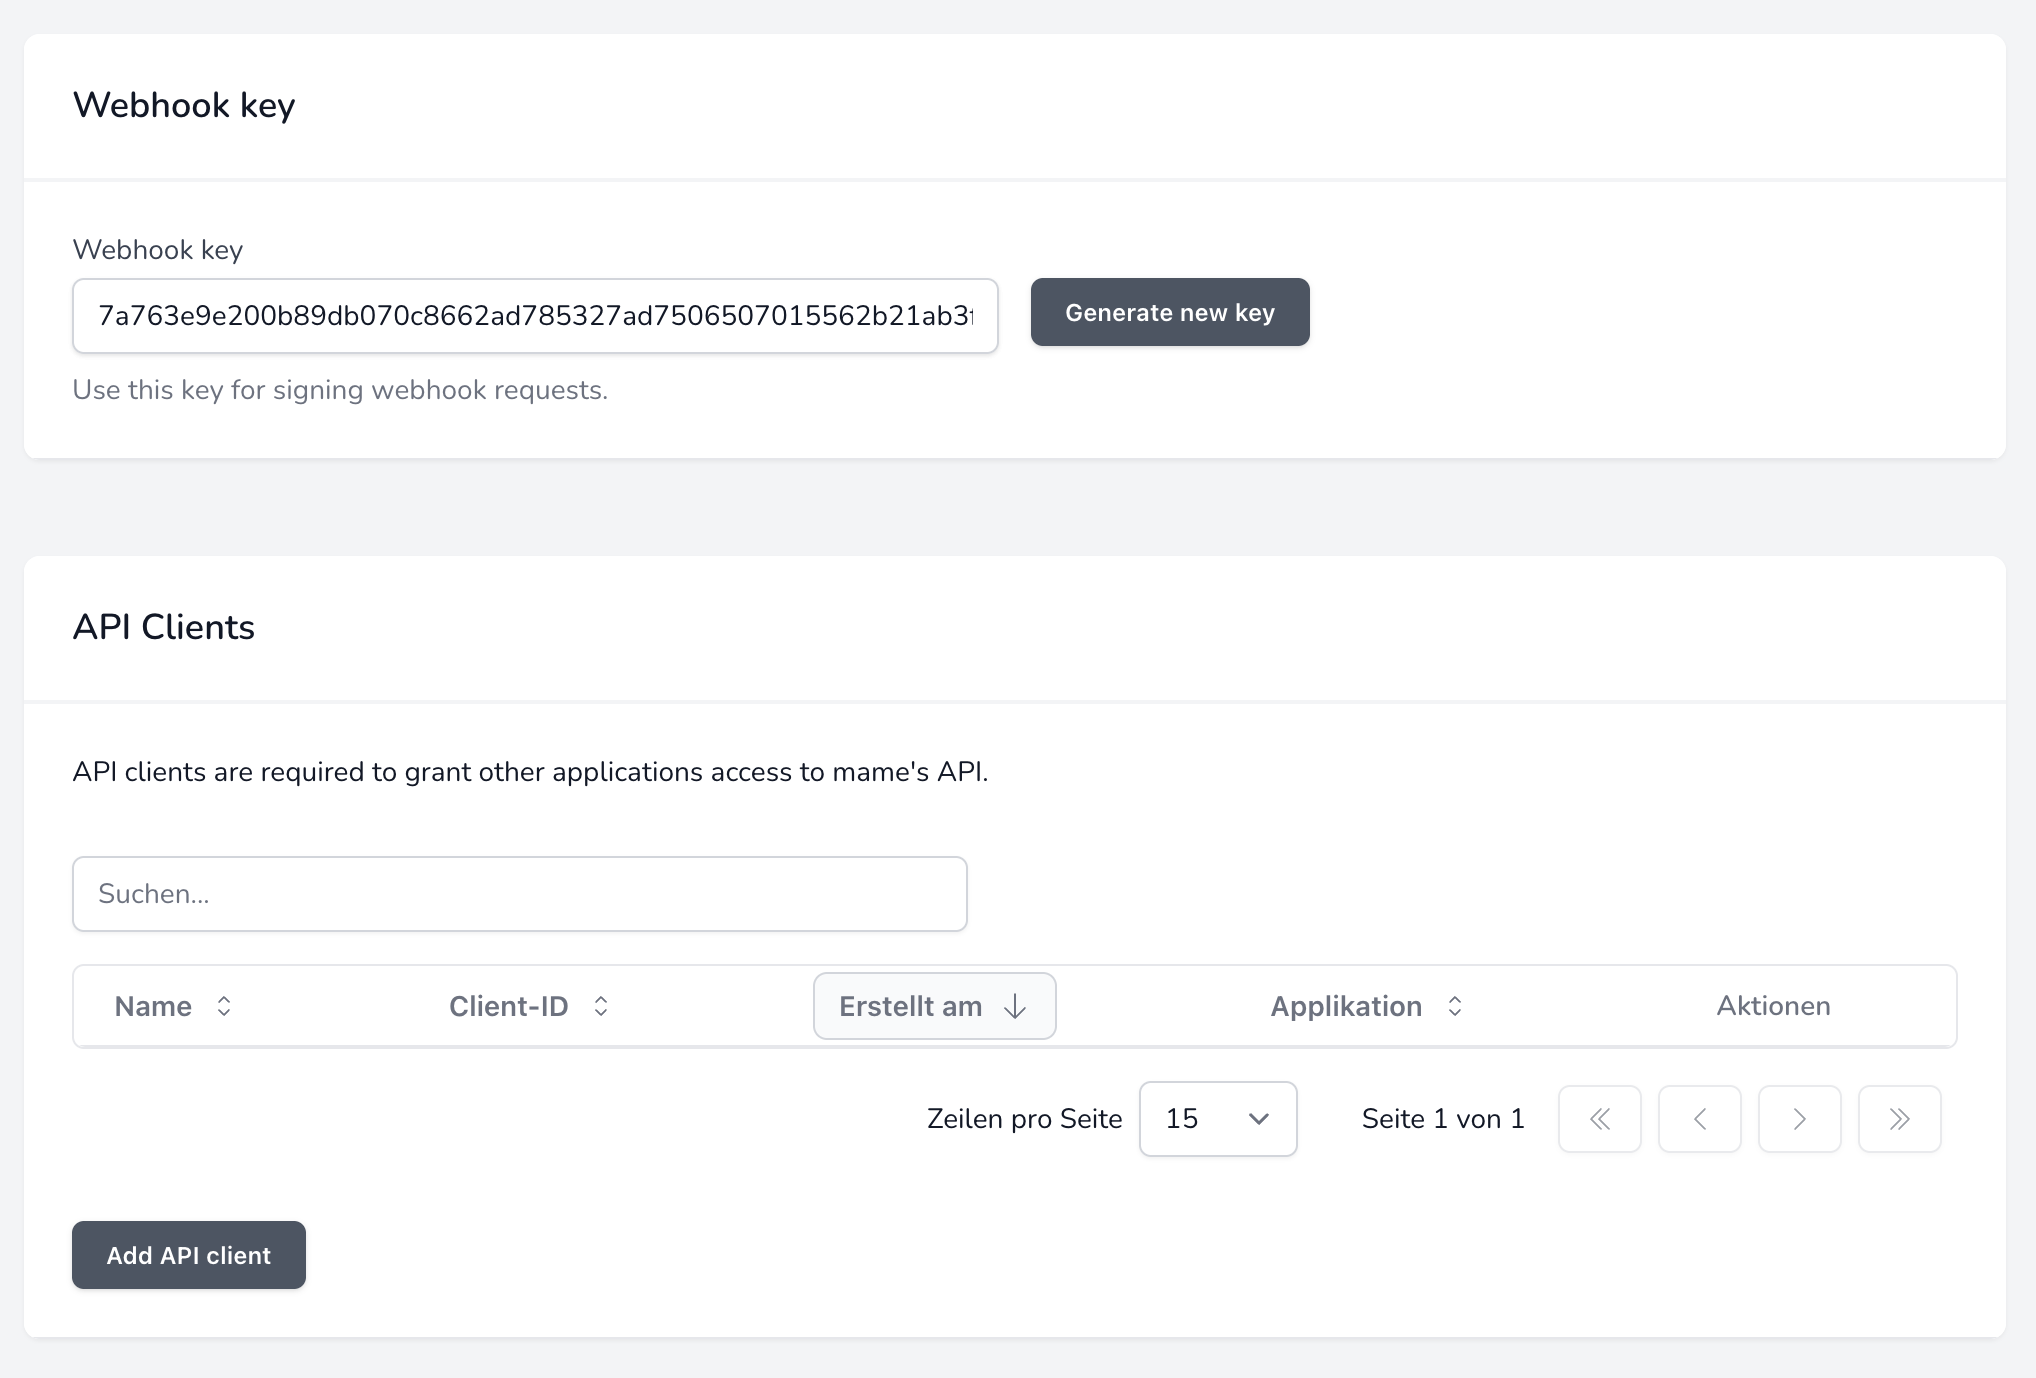
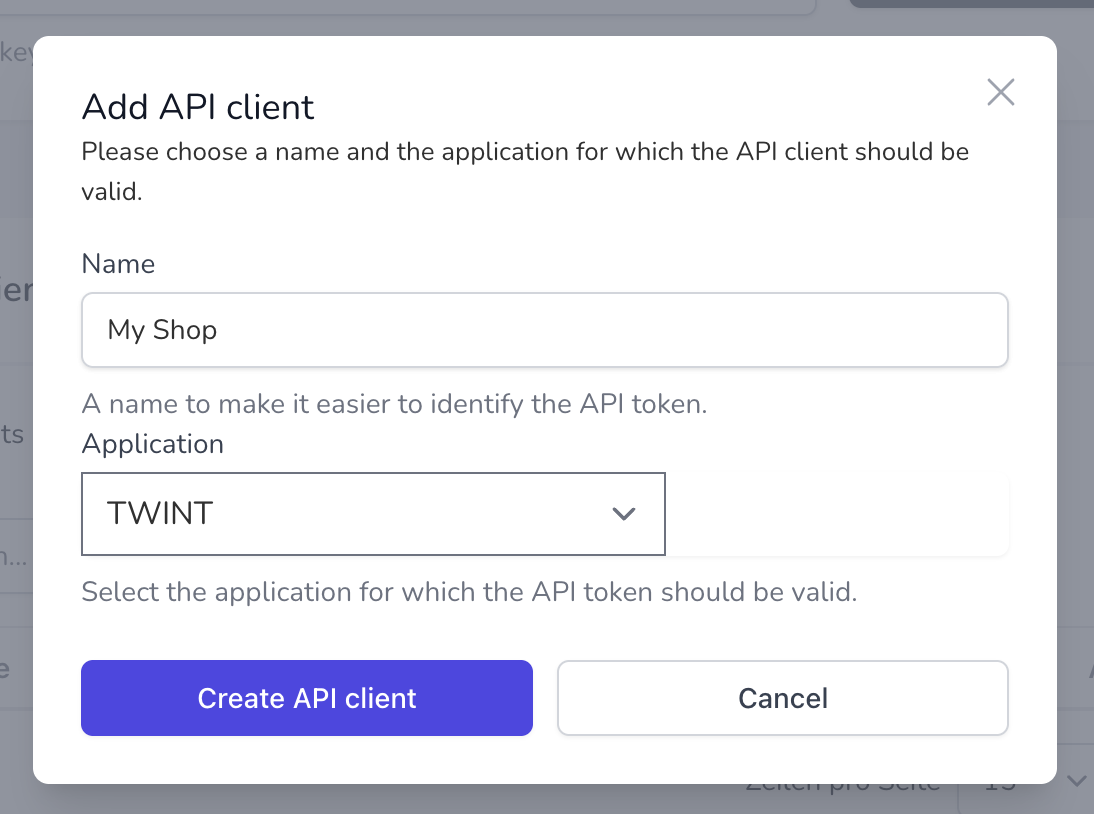
On the same page under “Api Clients > Add Api client” you can generate a new client ID and client secret. Enter any name (e.g. the name of your shop) and select “TWINT” in the selection field.
Caution: The API client secret is only displayed once after creation. Copy the entire client secret and paste it into the corresponding field in the WordPress backend settings.
Note: An API client is required, not an API token.
Now enter client ID, client secret and webhook key in the corresponding fields in the setup assistant.
Step 3: Add payment configuration
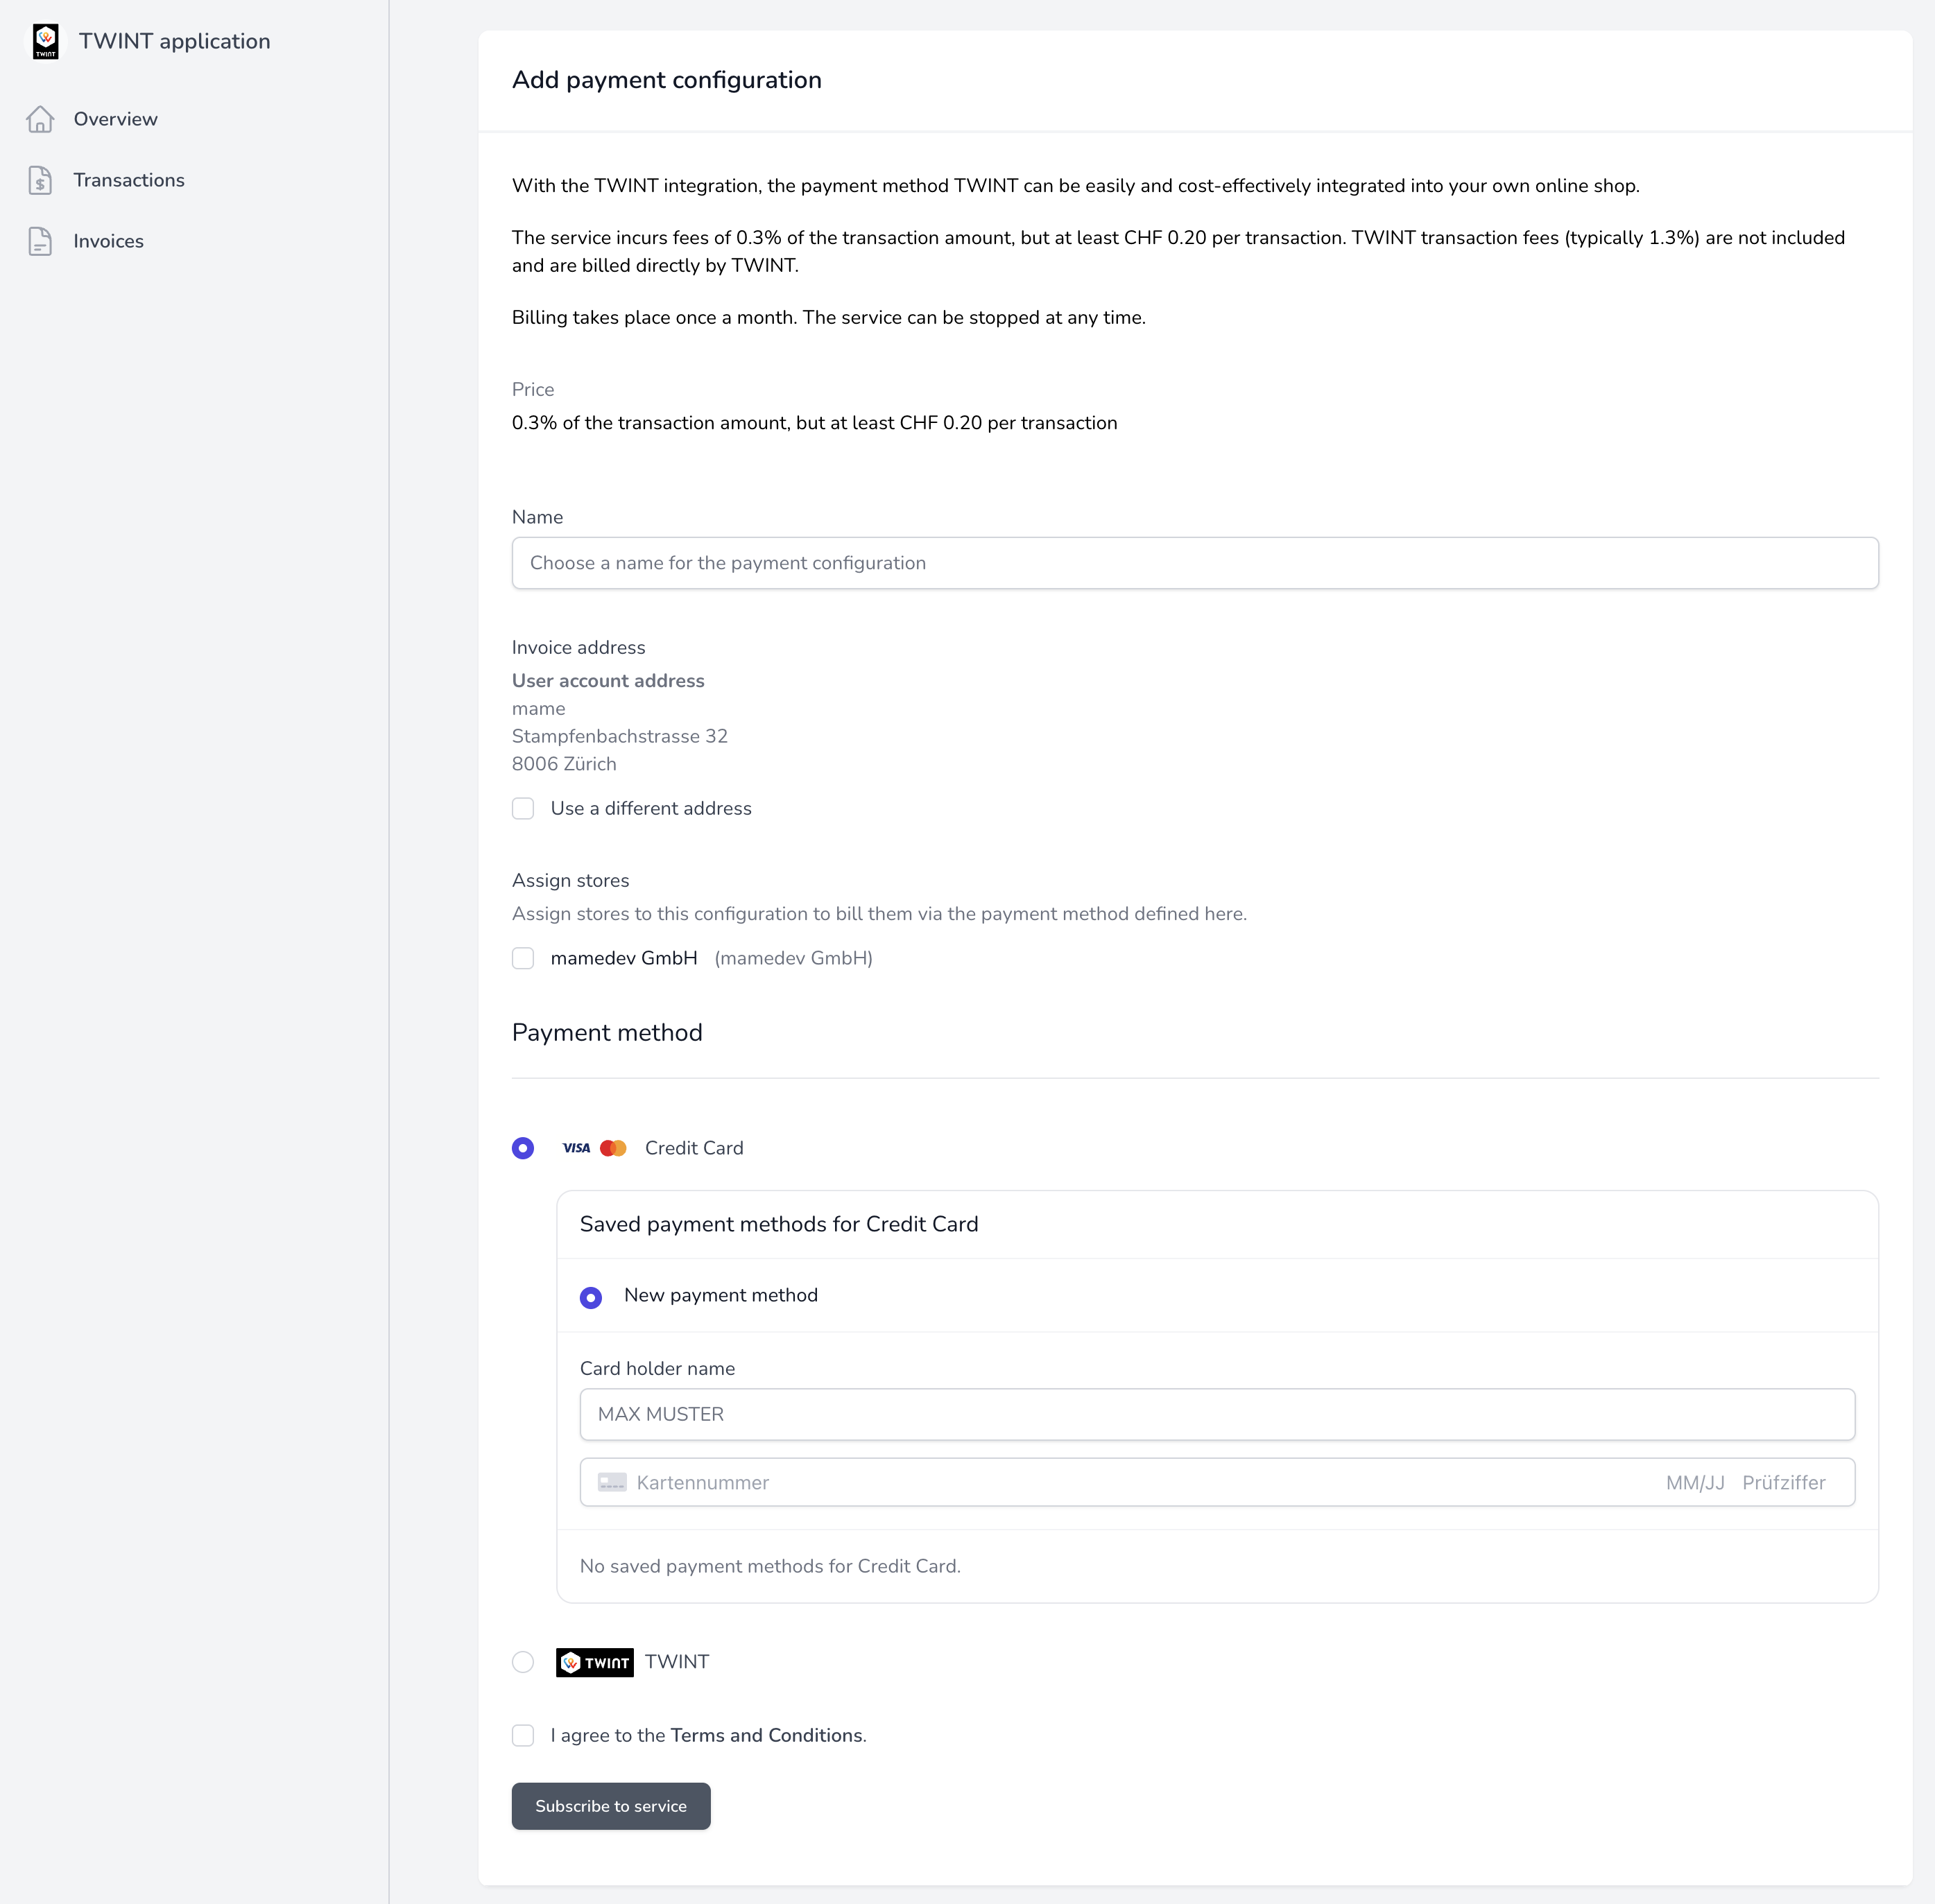
To enable billing of the transaction fees, a payment configuration must be added in your account at mamedev.ch.
After logging in, go to “Dashboard > Applications > TWINT” and add a new payment configuration using the “Add payment configuration” button. This payment configuration can then be assigned to one or more shops later on.
Step 4: Add store
In the TWINT portal:
In this step, a store must be added to the TWINT portal and linked to the mamedev.app account.
Log in to your TWINT portal account and go to “Settings”. If you don’t already have a bank account under “Accounts”, you can add a new one. The income from sales is transferred to this account.
Then go to “HOME” and click on the “Integrate TWINT” button under “Online shop”.
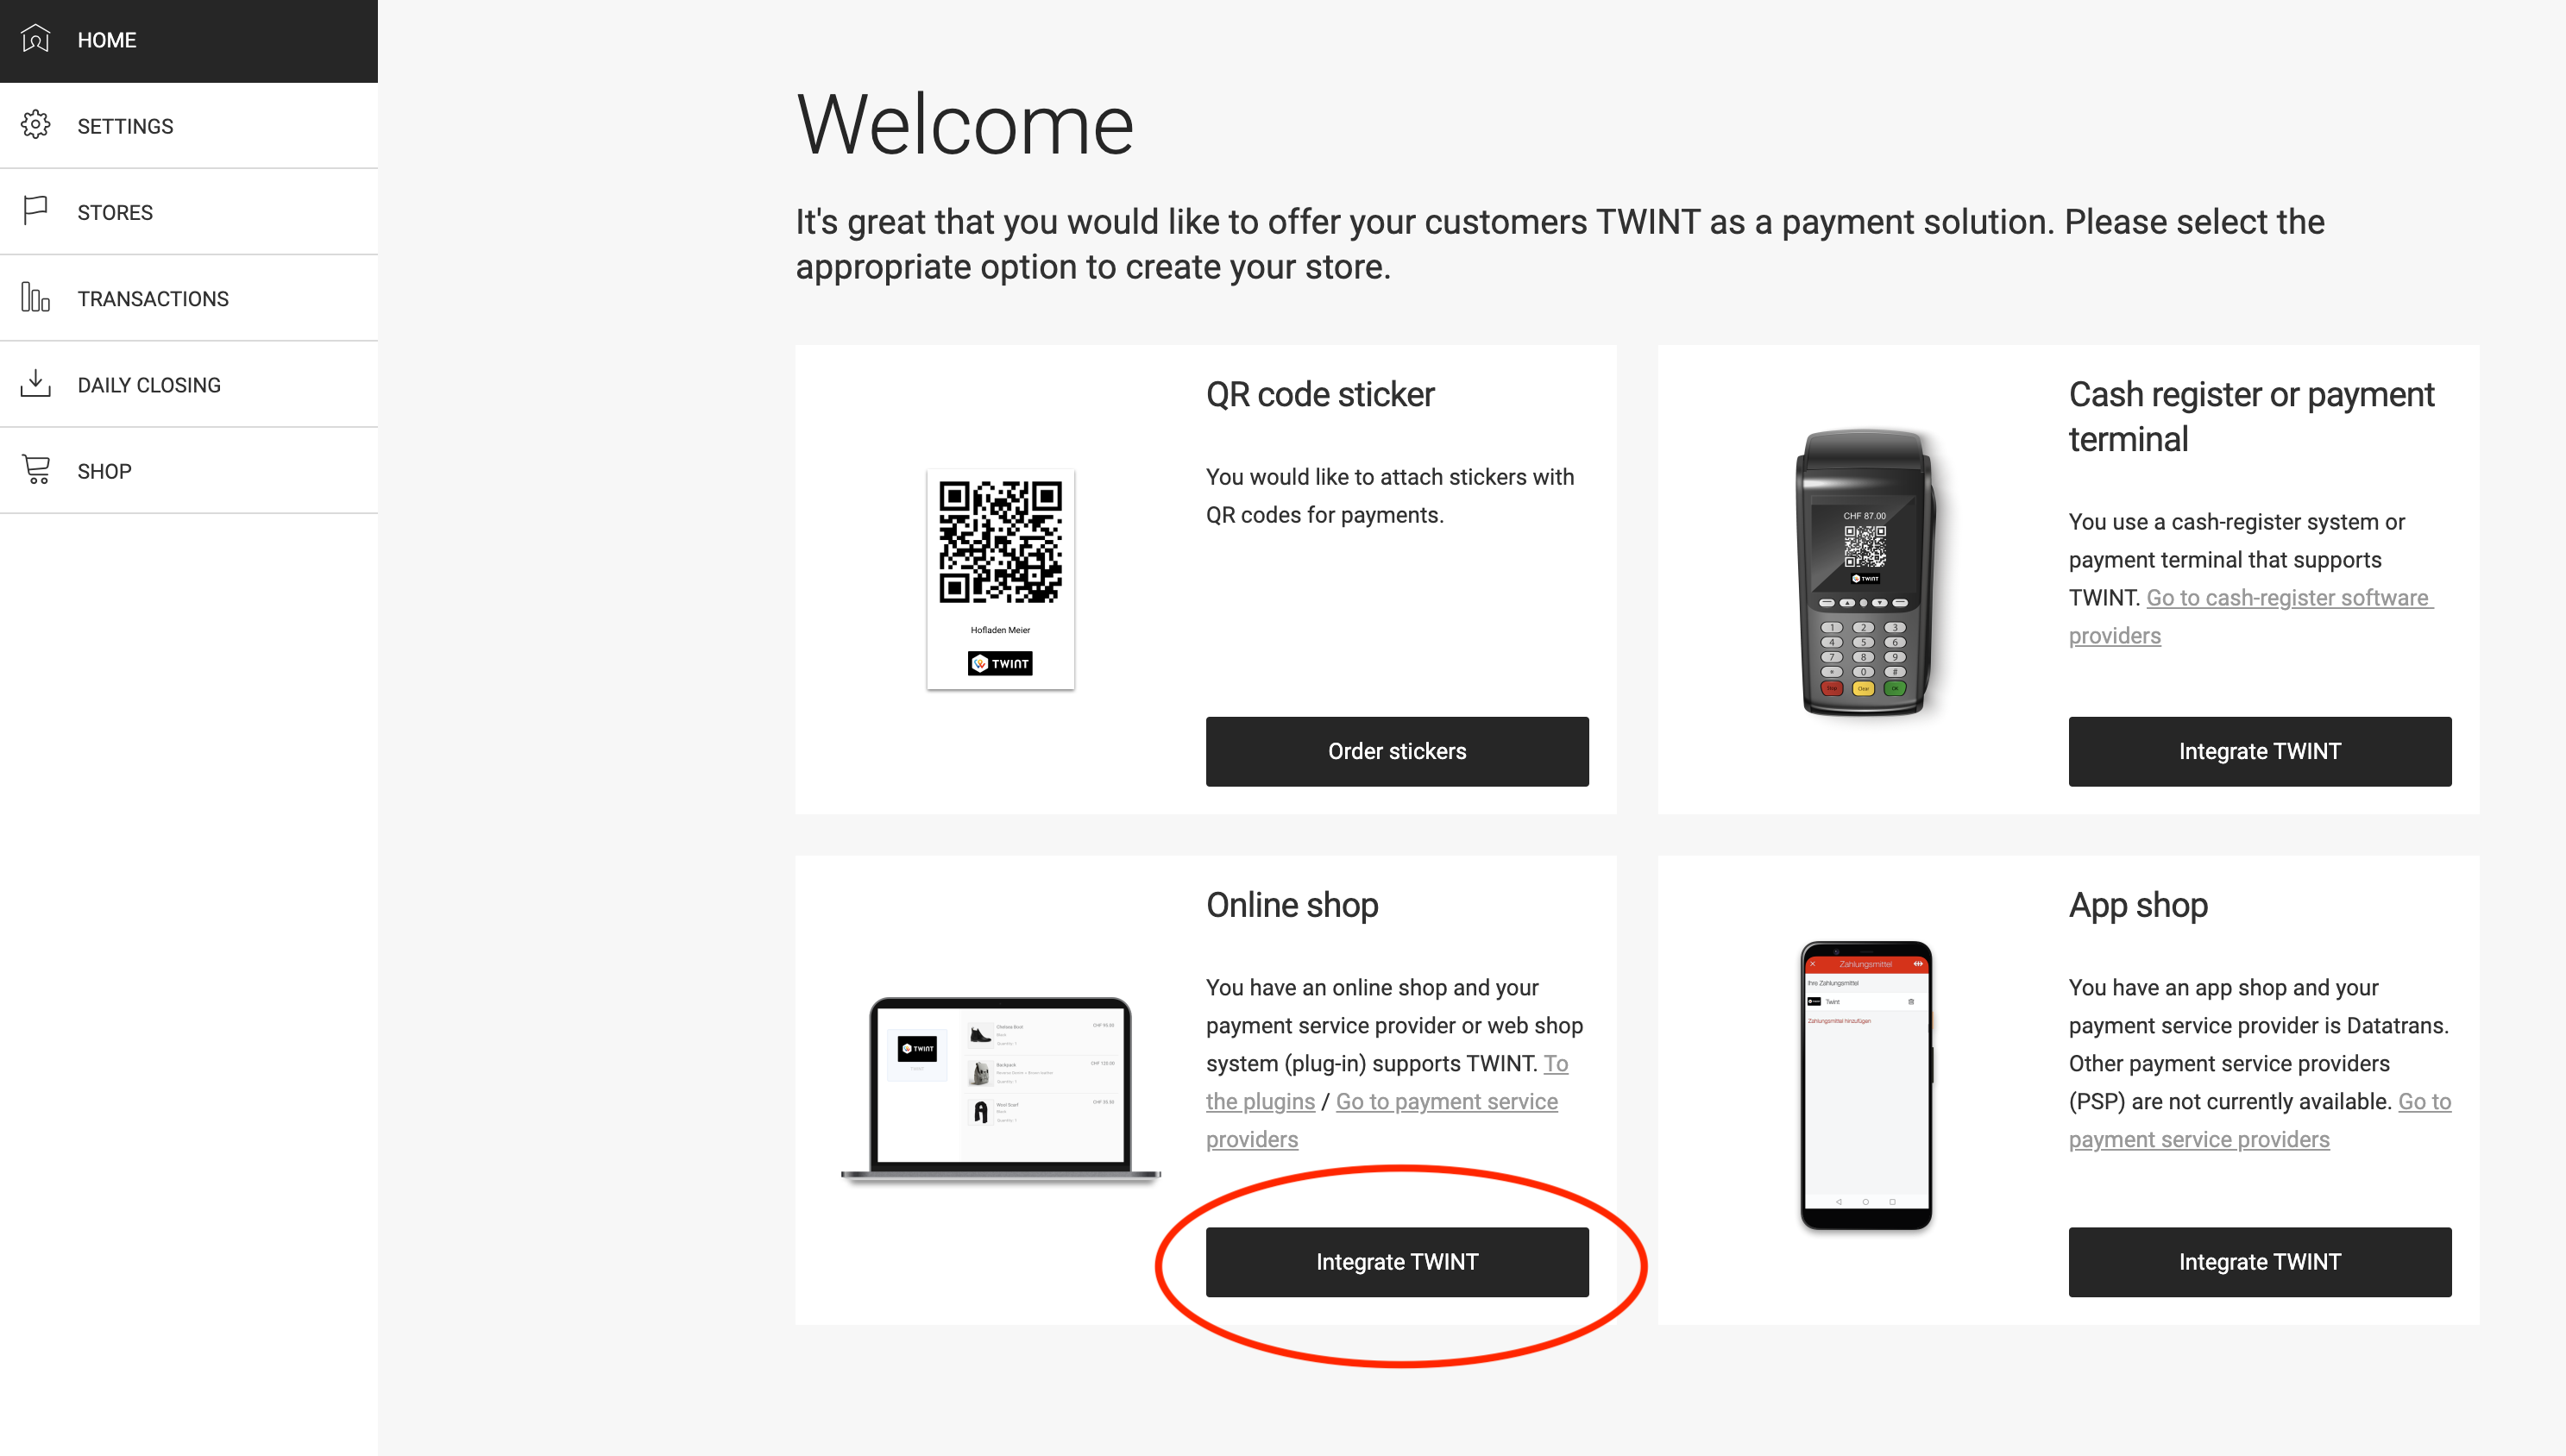
In the next step, select the solution “Standard”.

On the following screen (Integration), make sure to select “PSP” and “mame”.
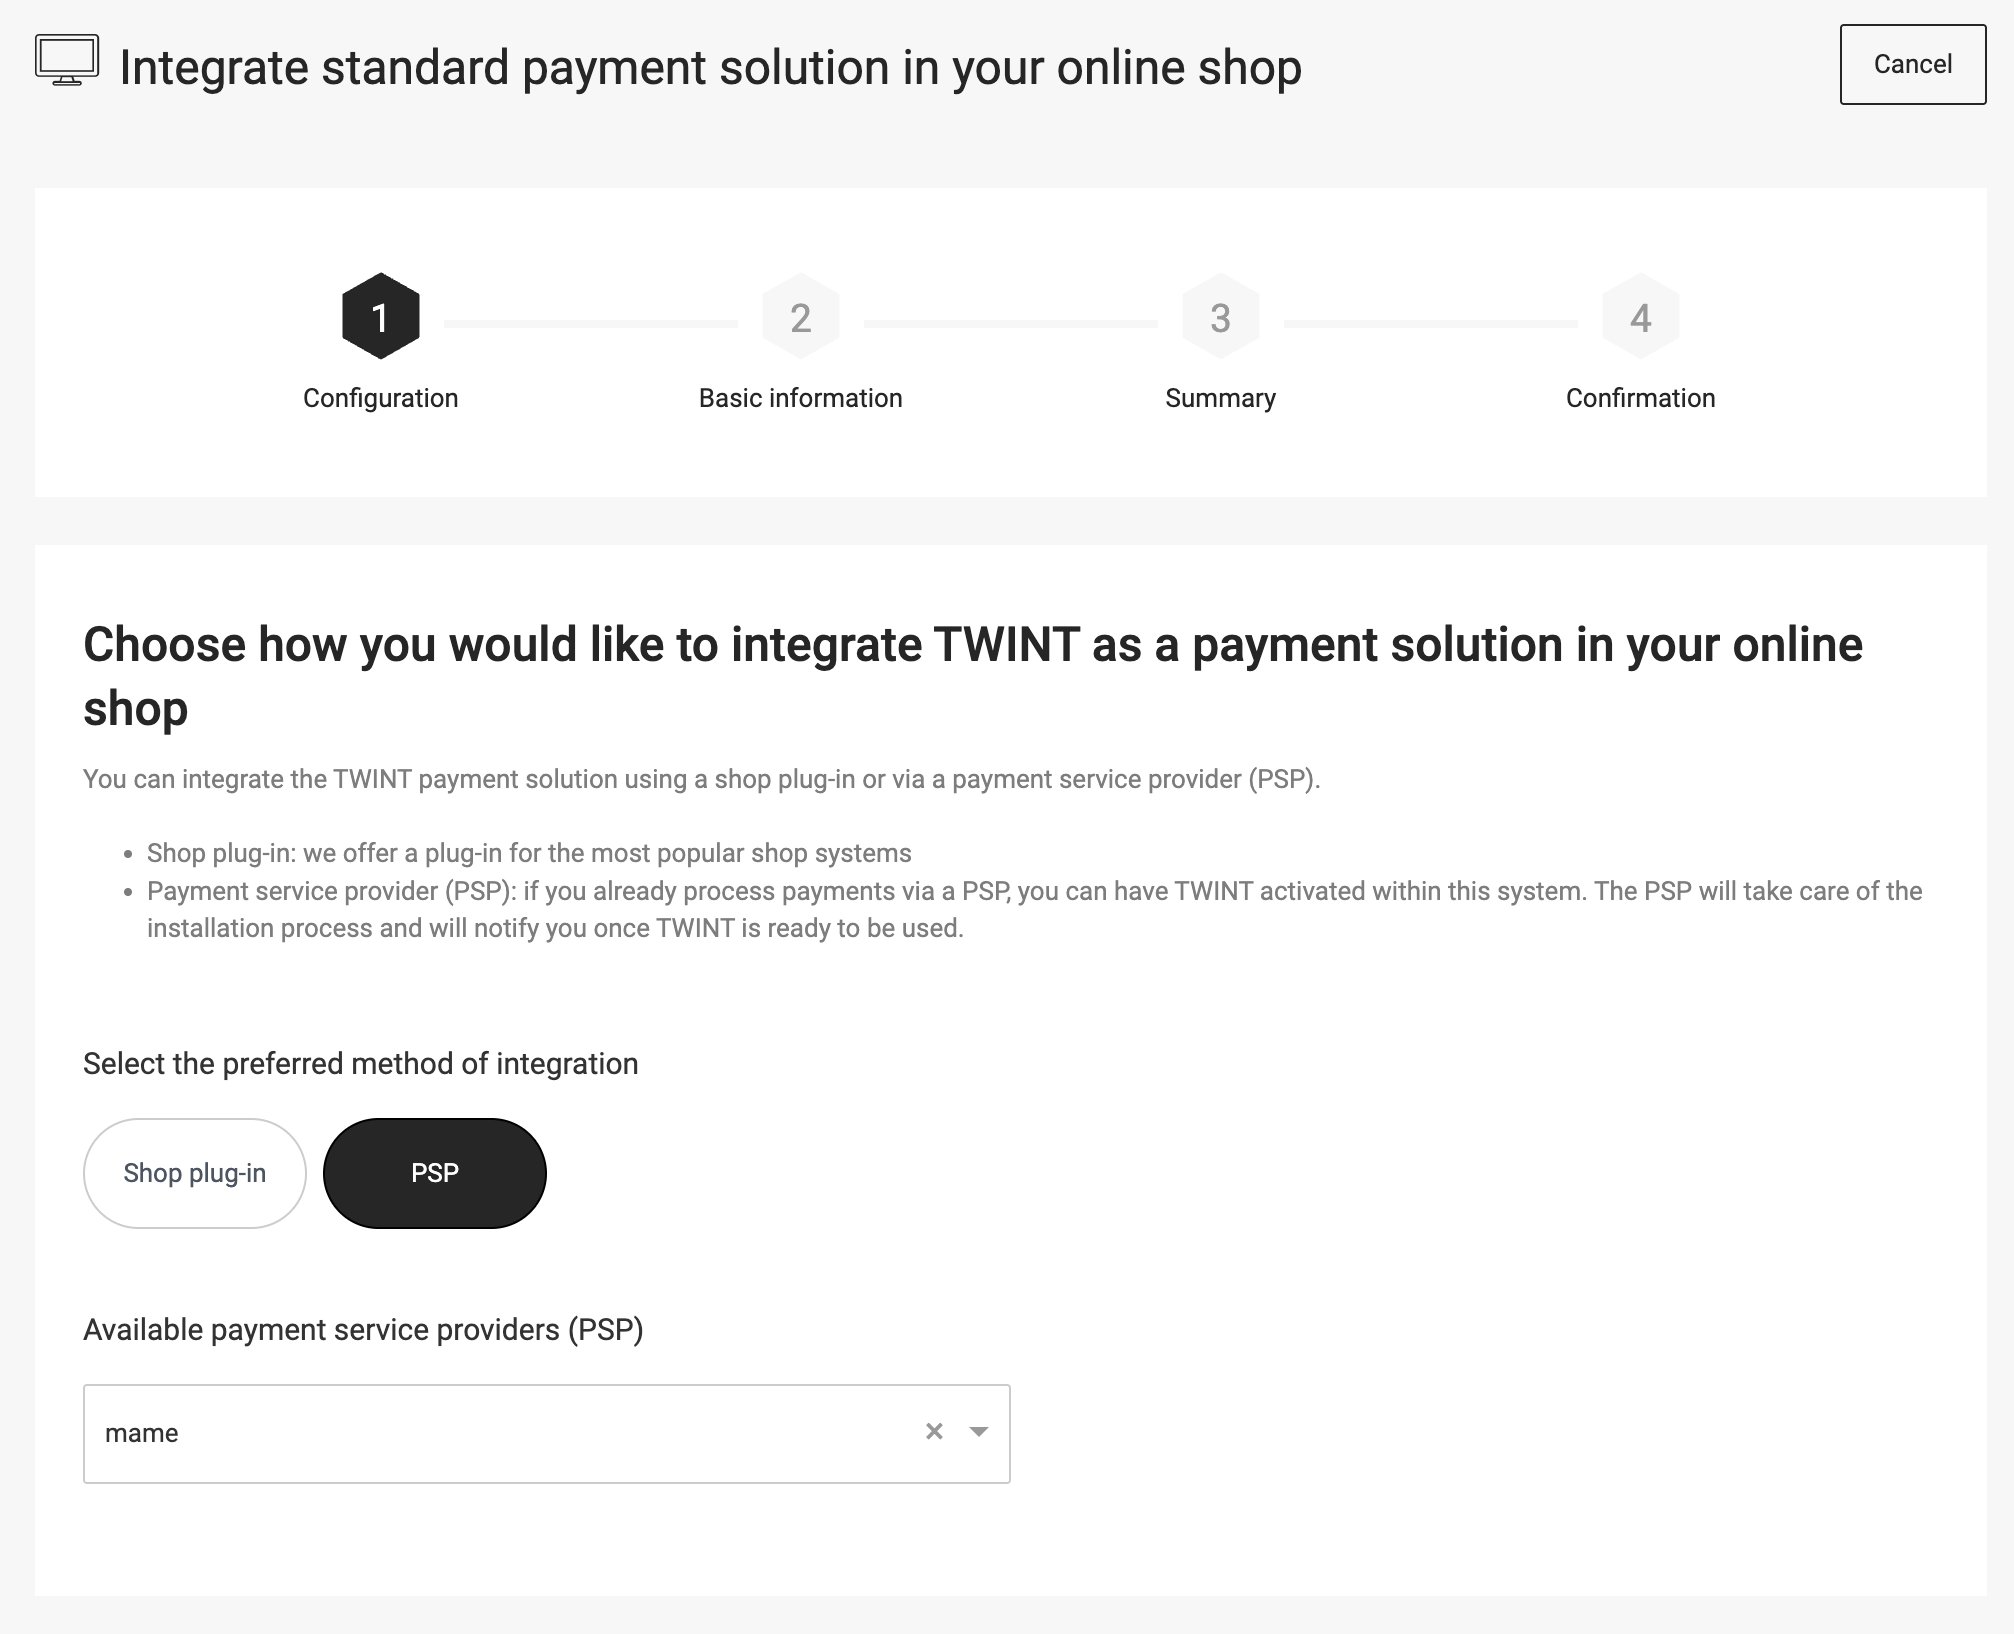
On the next screen (Basic Information), provide all the required information about your online shop and click “Next”.
After the store is added, the Store UUID is displayed. The Store UUID is needed in the next steps.
In the WordPress backend:
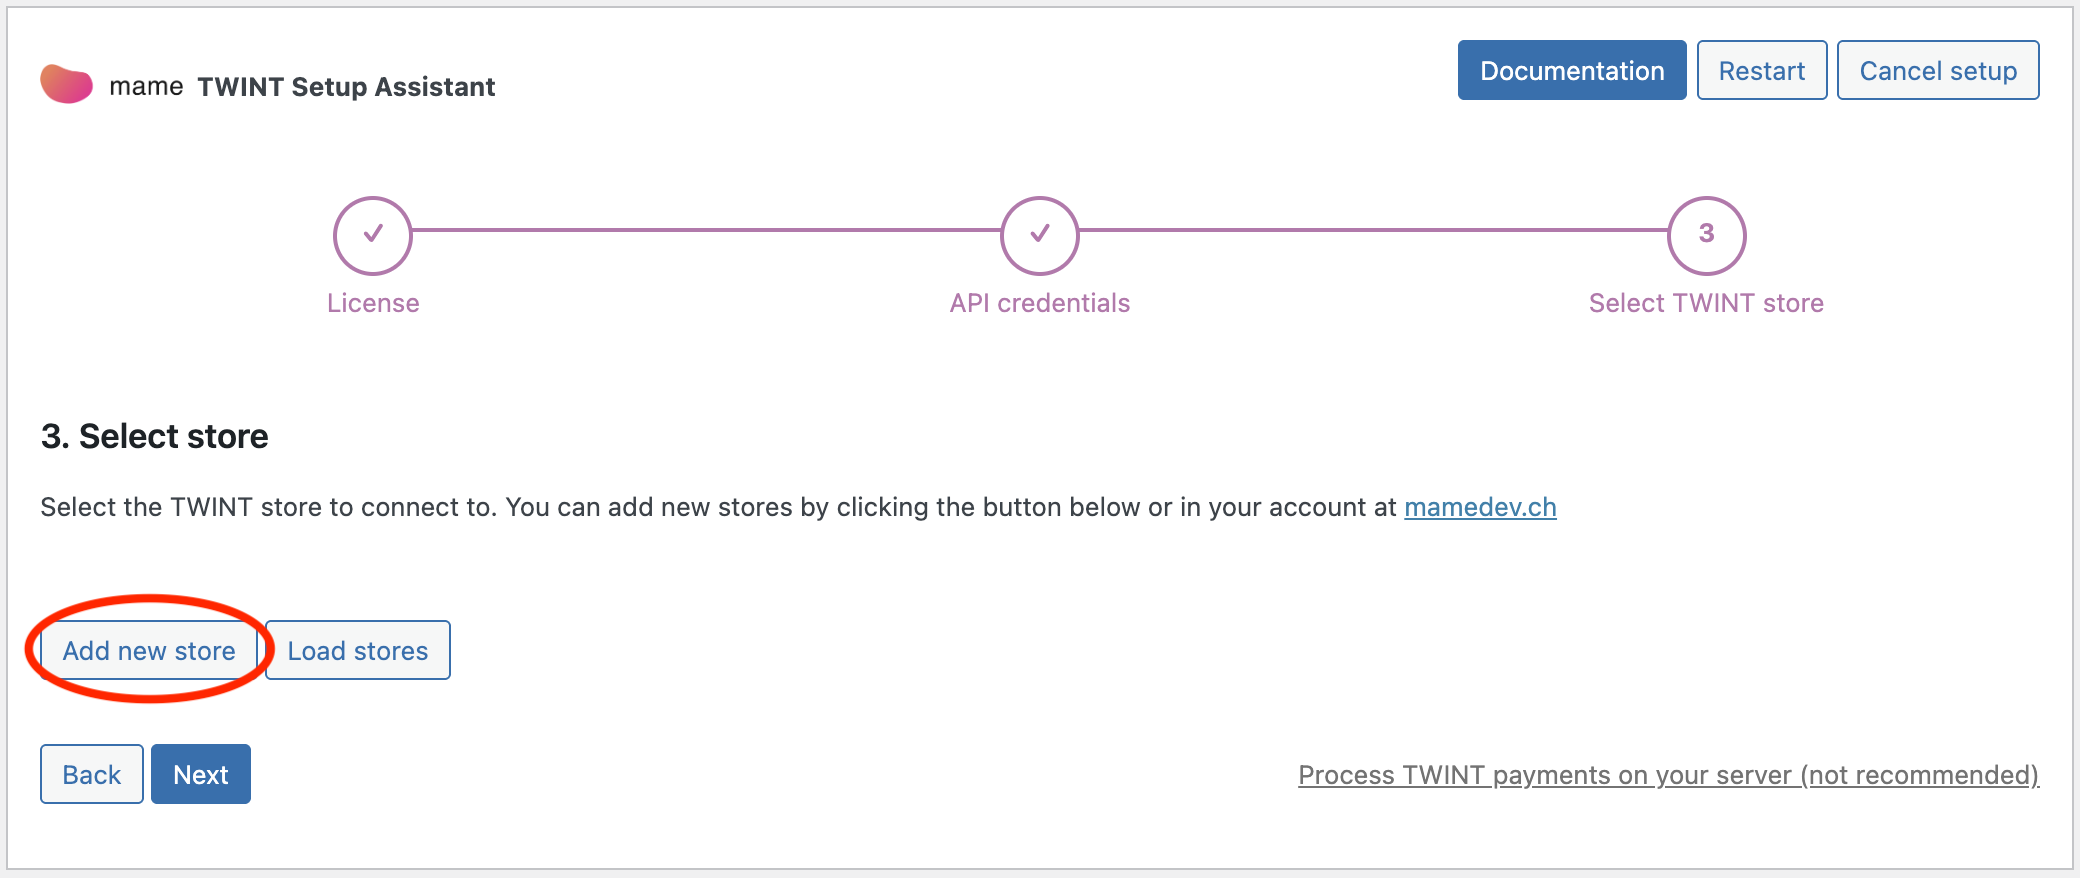
Go back to the setup assistant in the WordPress backend and click on the “Add new store” button in step 3. A new window opens to activate the service at mamedev.ch and link the TWINT store.
After you have activated the service, the “Add Store” form can be completed and submitted as follows:
- Store name: Any name for identification at mamedev.app and in the WP backend. The name is not displayed to customers.
- Public name: The name of the store as it should be displayed to customers.
- Store UUID (TWINT): Enter the Store UUID of the store that you just created in the TWINT portal (see above).
- Store logo (optional): A logo of size 800px x 400px. This field is optional.

Click on “continue”. If the store was added successfully, you can close the window and continue with the setup assistant. The store should now appear as a selection. If this is not the case, you can click the “Load Stores” button to update the list.
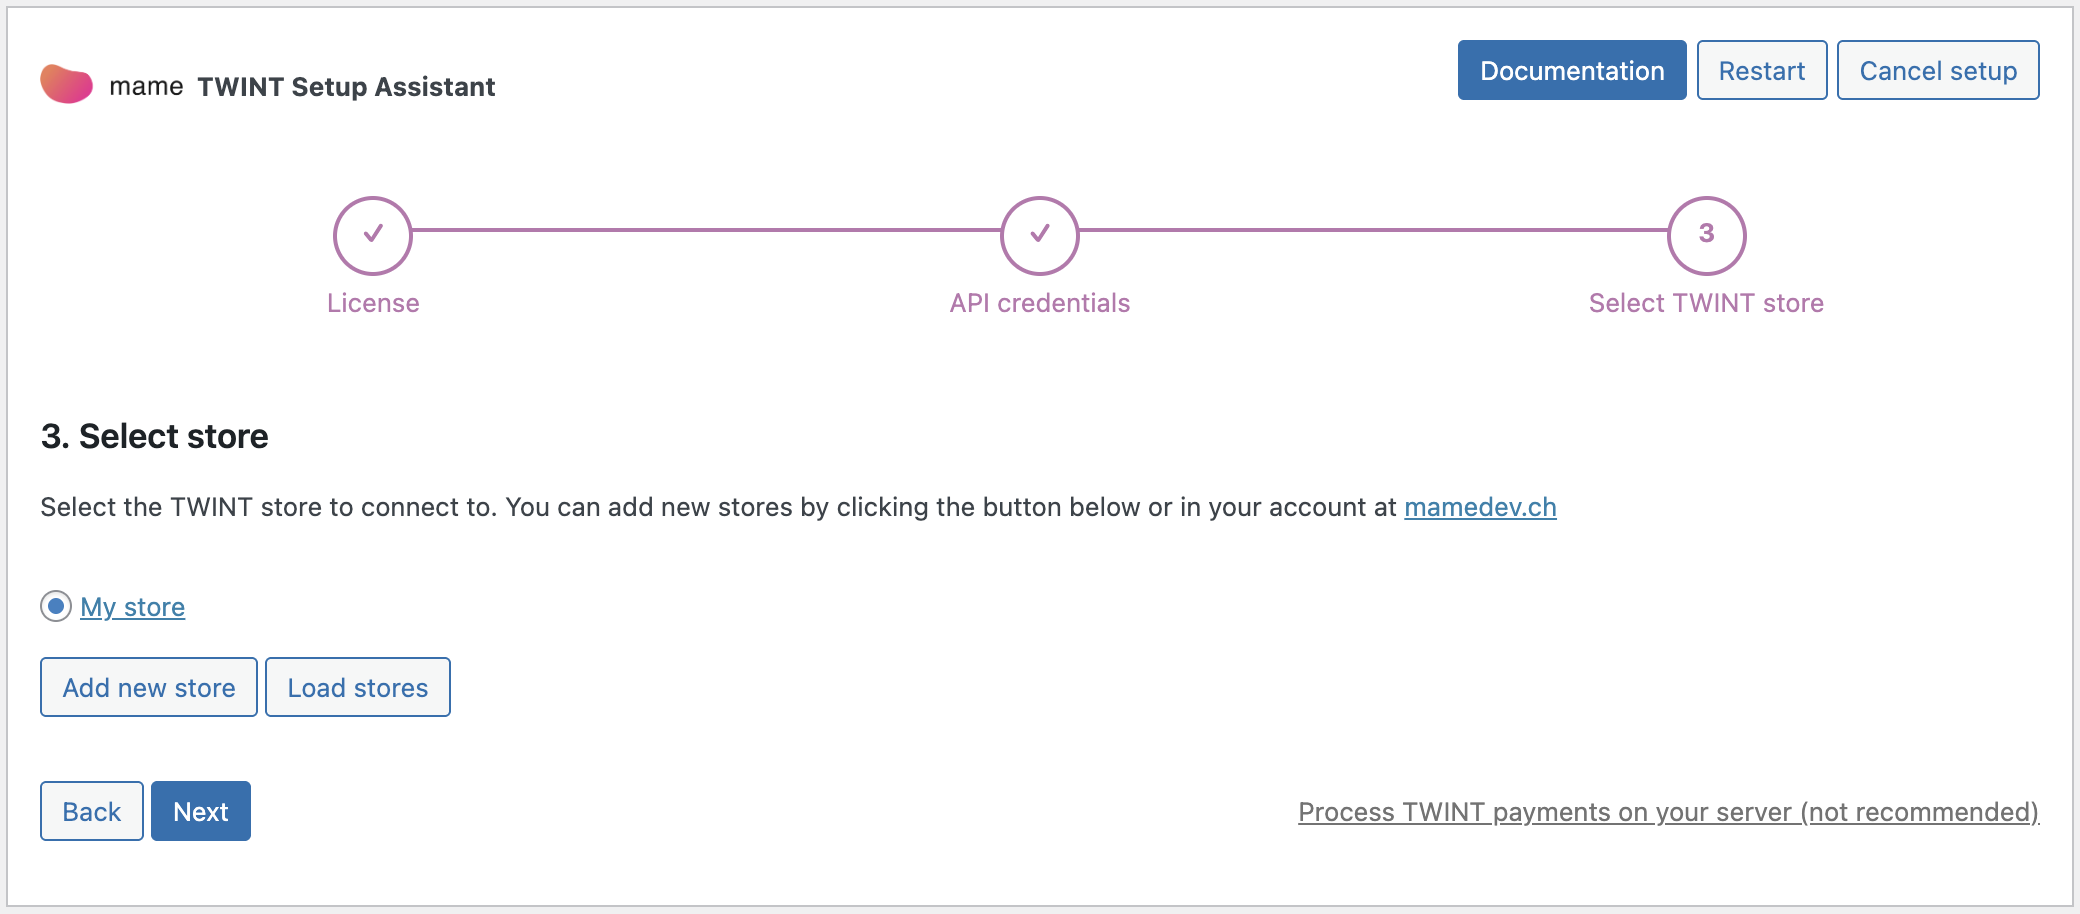
Select the store and click “Next”.
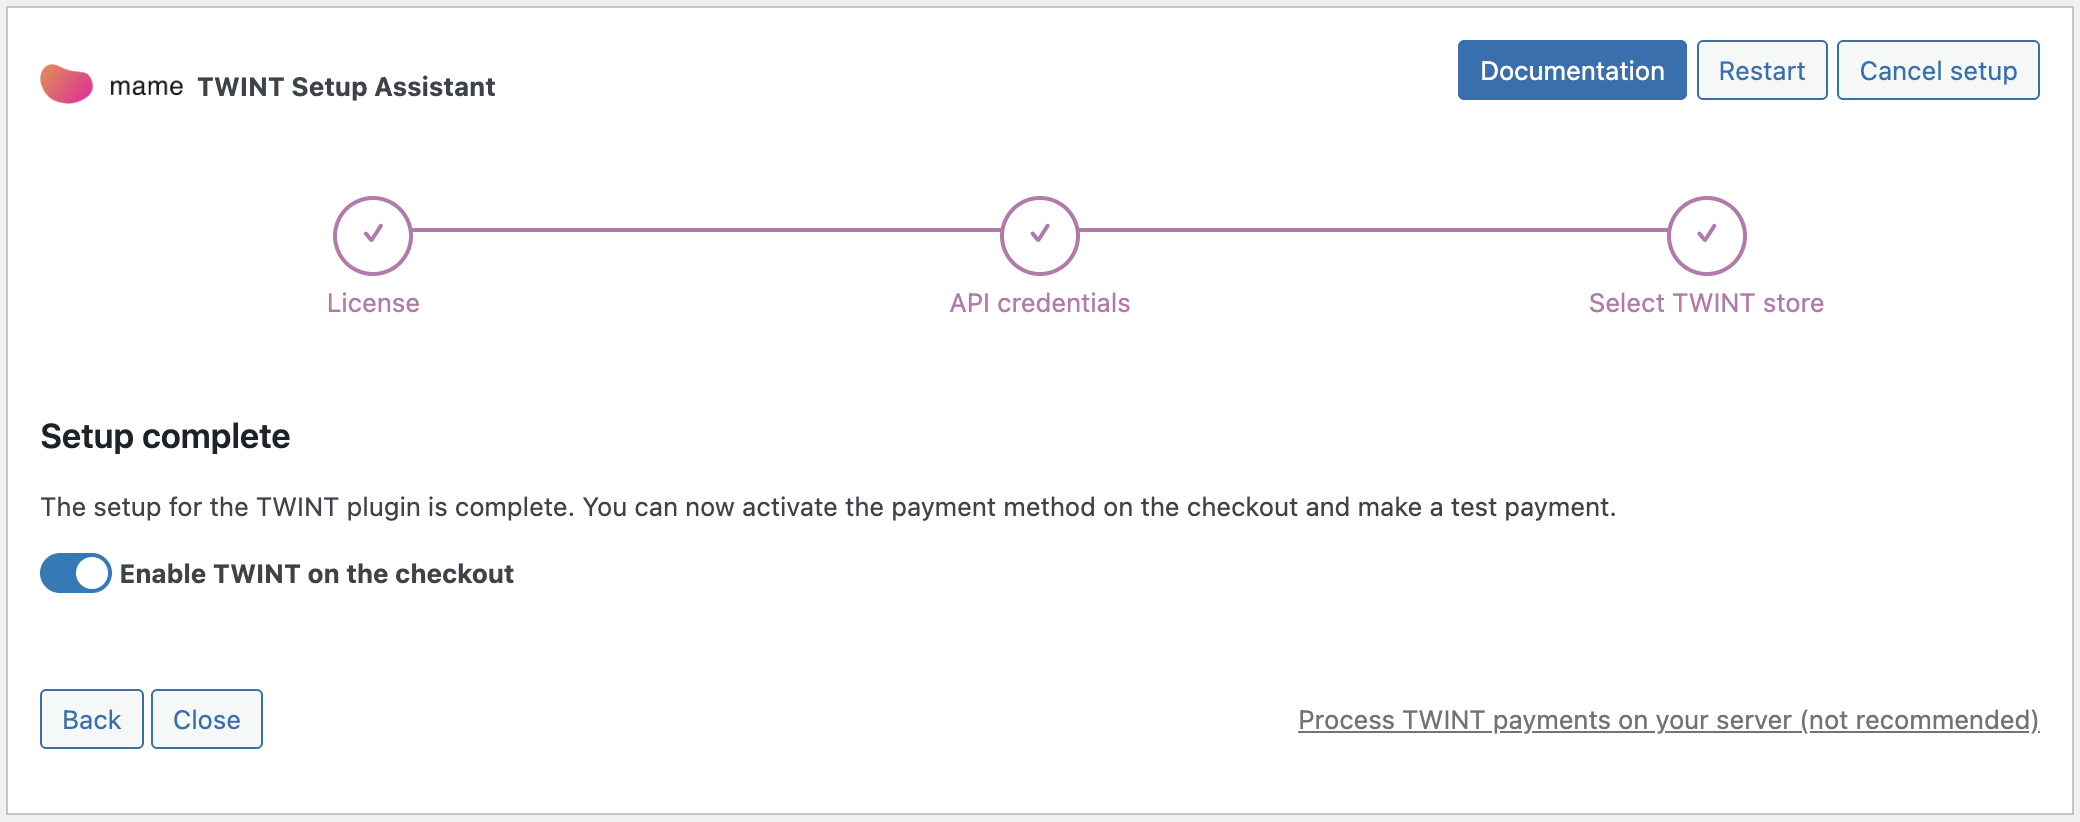
Setup complete
Now all you have to do is activate the WooCommerce payment method and the setup of the TWINT plugin is complete.
It’s best to make a test payment right away. You can refund the payment directly from the order edit screen in the WordPress backend.