Integration via your own server (not recommended)
⚠️ Warning: This integration is deprecated and will not be available after February 2026. Please use the integration via server of mame instead.
With the direct integration, your website connects directly to TWINT, and the entire TWINT payment process runs on your own server.
This type of integration remains possible for the time being but is no longer recommended for the following reasons:
-
The payment process takes place on your server. This can significantly impact website performance and lead to increased payment failures.
-
The performance of the payment process depends on your server’s performance and configuration. Due to this increased dependency, plugin and theme conflicts are more likely.
-
Security depends on your WordPress installation and hosting environment. The TWINT security certificate is stored within the WordPress installation.
-
Subscription payments and saving TWINT as a payment method for future purchases are not possible, as storing the required keys demands higher security standards.
You can find the setup instructions for the recommended integration via mame on the following page.
1. Important information
Because of the certificate for the TWINT plugin being saved inside the plugin directory it is important that you prevent direct access to the directory /wp-content/uploads/mame_twint inside your WordPress installation. After activating the plugin and uploading the certificate (see 1. Settings in the TWINT portal) you can enter the URL https://mywebsite.ch/wp-content/uploads/mame_twint/twint.pem (replace mywebsite.ch) to check if the certificate file is accessible. If you get an error everything is set up correctly. Otherwise read on.
Server settings
Depending on your server you will have to make different settings. Please ask your host which settings below apply. In the case of uncertainties we recommend our installation service.
Apache
Make sure that inside the Apache config file of your Server AllowOverride All is set. If this is the case no further steps are necessary. Usually only the webhosting company can change these settings.
nginx
Add the following restriction to the nginx configuration of your server:
location /pfad/zur/website/wp-content/uploads/mame_twint {

deny all;

}
Replace /pfad/zur/website with the path to the WordPress installation.
Other servers
Activate the directory protection for the directory wp-content/uploads/mame_twint in your WordPress installation. On some hosts this is possible directly out of cPanel.
2. Convert TWINT Certificate
To connect your shop(s) to TWINT you need a valid certificate which you can create and download on the page “Settings -> Order certificate from SwissSign”. Then it has to be converted into the correct format.
The downloaded certificate must be converted from file type .p12 to .pem. There are three different ways to do this (only one needs to be done):
1. Automatic conversion
This is the easiest way to convert the certificate. The certificate will be converted to the correct format by the plugin if the PHP extension OpenSSL is enabled on your web hosting. Simply use the upload button in the TWINT settings in WooCommerce after you have entered and saved the certificate password.
2. Conversion using the command line
If OpenSSL is not enabled on your web hosting you can convert the certificate and private key to the PEM format using a command line tool (e.g. Terminal on Mac):
openssl pkcs12 -in twint.p12 -out twint.pem -passout pass:PASSWORD
Replace twint.p12 with the name of your certificate (path) and PASSWORD with a password to encrypt the private key in the PEM file. You will then be asked for the password you created in the TWINT portal when you created the certificate.
You can then upload the certificate to the server in one of the following two ways:
- Rename the converted .pem file to “twint.txt”(uploading PEM files is restricted be WordPress) and upload it by using the upload button in the TWINT settings in WooCommerce.
- Upload the PEM file to the folder /wp-content/uploads/mame_twint of your WordPress installation (create the folder if it doesn’t exist). Please make sure that the file is named “twint.pem”.
3. Conversion using an online tool
Alternatively you can also use an online tool, e.g.:
https://www.sslshopper.com/ssl-converter.html
You can then upload the certificate to the server in one of the following two ways:
- Rename the converted .pem file to “twint.txt” (uploading PEM files is restricted be WordPress) and upload it by using the upload button in the TWINT settings in WooCommerce.
- Upload the PEM file to the folder /wp-content/uploads/mame_twint of your WordPress installation (create the folder if it doesn’t exist). Please make sure that the file is named “twint.pem”.
3. Instructions for integration via your own server
Step 1: Enter license key
In the first step, enter the license key that you received via email when you purchased the plugin. You can also find the license in your account at mamedev.ch.

Step 2: Enter TWINT parameters
TWINT portal:
You will receive the parameters required for this step in your TWINT portal account:
https://portal.twint.ch
Log in to your TWINT portal account and go to “Settings”. If you don’t already have a bank account under “Accounts”, you can add a new one. The income from sales is transferred to this account.
Then go to “HOME” and click on the “Integrate TWINT” button under “Online shop”.
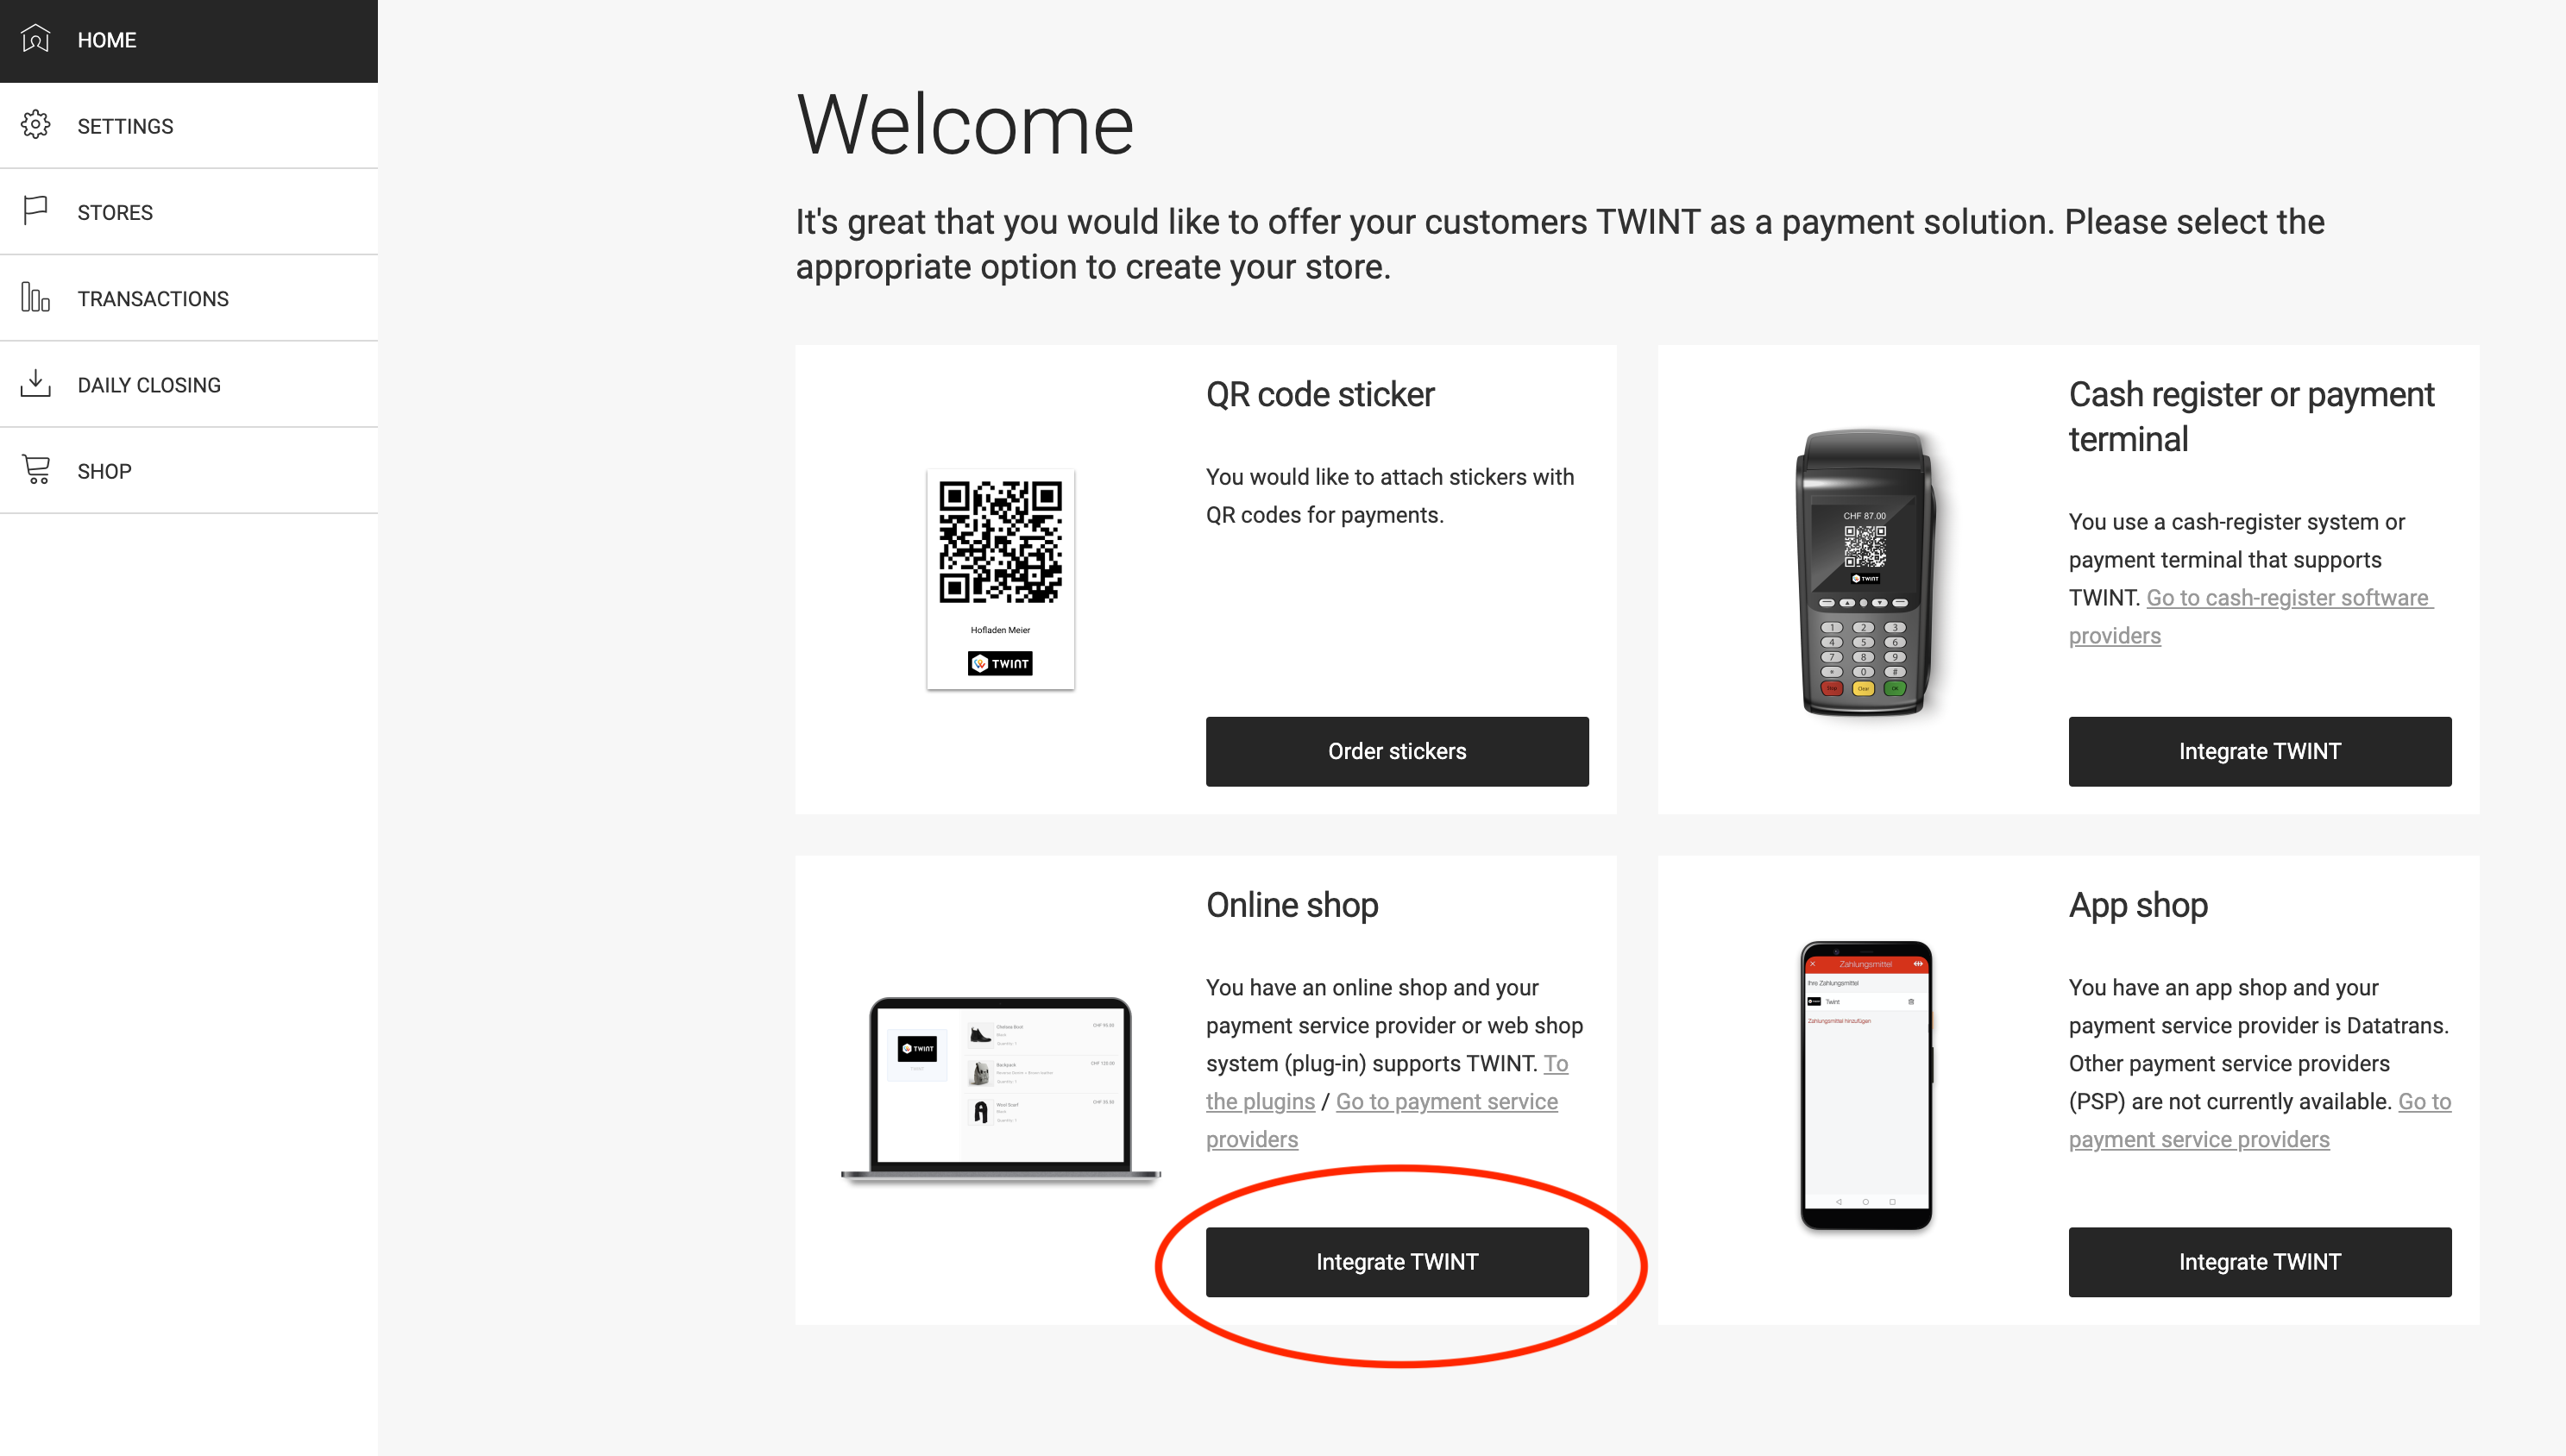
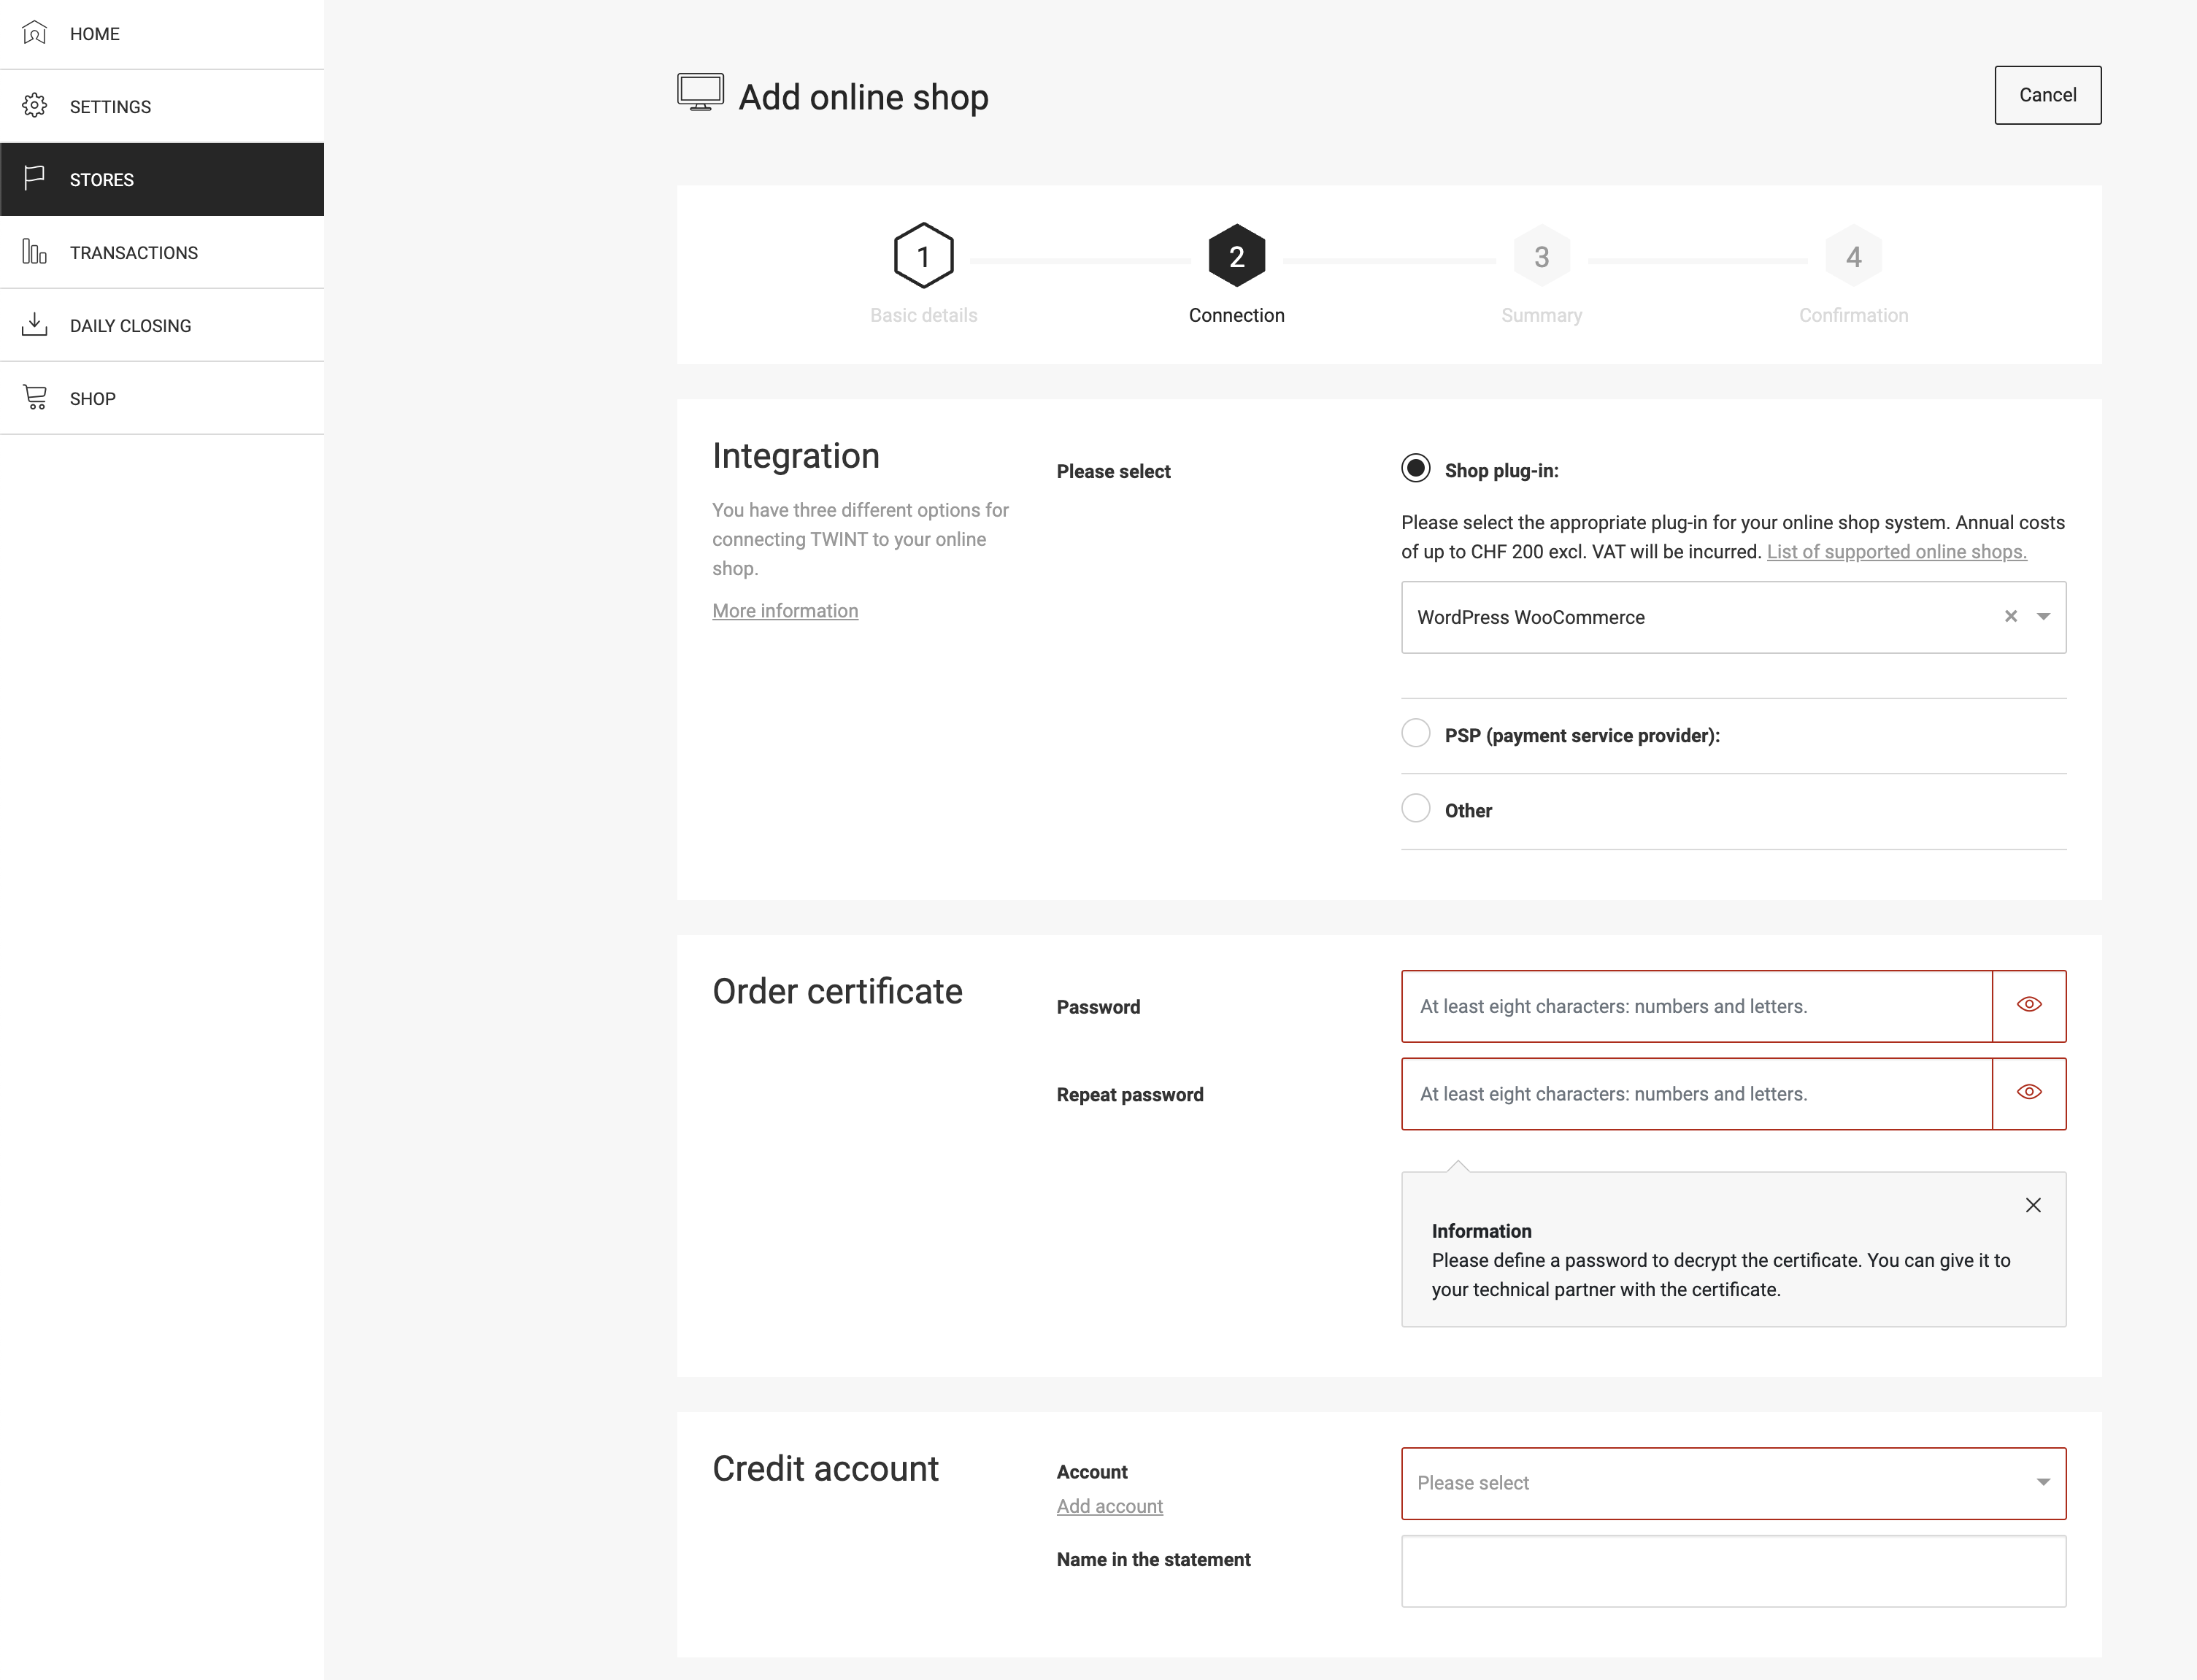
Fill in the basic information and in the second step (connection) select the integration “Shop plug-in” and “WordPress WooCommerce”.
When adding the first store, a certificate must also be created, which is required for the setup at WooCommerce. To do this, set a password under “Order certificate” and remember it or save it in a safe place. Important: The password will be required again later and can no longer be viewed after the certificate has been created.
If special characters are used for the password, only the following may occur: ~!@#%^*_+-={}[]:,./
The previously added bank account must be selected under “Credit account”.
After the registration in the last step the UUID will be displayed. Keep this value somewhere for later steps. To display the UUID again go to “Stores” and edit the settings of your shop.
On the same page you can also download the certificate, which will later be required for the WooCommerce settings.
WordPress backend:
Go back to the setup assistant in the WordPress backend and enter the Store UUID you just received, the certificate password and any Cash Register ID (e.g. the name of the shop).

Step 3: Convert the TWINT certificate
The certificate downloaded in the previous step can now be uploaded using the “Upload file” button.
If uploading the certificate fails, either the password is incorrect or the certificate could not be converted automatically. On the “Convert TWINT certificate” page you will find further options to convert the certificate into the correct format.

Step 4: Enroll cash register
In the last step, the virtual cash register must be registered once with TWINT. To do this, you can click the “Enroll” button.

Setup complete
Now all you have to do is activate the WooCommerce payment method and the setup of the TWINT plugin is complete.
It’s best to make a test payment right away. You can refund the payment directly from the order edit screen in the WordPress backend.
